Saturday, January 2, 2016

Gumdrops Tutorial

In the spirit of more handmade Christmas gifts, I decided to make some gumdrops. Candies are very pretty to look at, some are easy to make,  and it seems like everyone (besides me) enjoys eating candy.
Since I will be gifting them, I made a large batch that yielded 16 cups of gummies, but the recipe could be shrunk down if making just a few.

Strong peppermint drops
INGREDIENTS:

For sugar syrup:
8 cups sugar
2 cups water

For gelatin: 
3 packages (12 envelopes) plain gelatin
2 cups cold water

For finishing:
1/4 tsp each FOOD GRADE oils or essences (I used lemon, orange, vanilla and peppermint)
10 drops food coloring
(amounts based on quartering recipe to make 4 flavors/colors gumdrops)
2-3 cups Sugar (for coating)


I made the gumdrops in 2 separate batches, as I did not have enough molds to make the whole batch at once. The process was the same for both batches. I started by making a simple syrup with 4 cups of sugar to 1 cup of water. 


I brought to a boil on high and simmered on medium...


...as the sugar water boiled down it became more translucent. 


This is how it looked after 5-6 minutes of rendering. (on my second batch I cooked it longer, more like 10 minutes to get a thicker syrup. I feel like that was more successful in hardening the candy a bit more). 


While the syrup was cooking, I put 1 cup of cold water in a bow and evenly sprinkled it with 6 envelops of gelatin 


The powdered gelatin set quickly in the water...


...I stirred it to make sure that all the powder got evenly wet and mixed.


I then added the HOT simple syrup to the gelatin. I mixed well for several minutes trying to get rid of all the unsolved clumps of gelatin. I removed, with a small sieve, the few remaining unmelted clumps of gelatin...


...until all that remained was a clear liquid (with my 2nd batch I got a thicker liquid, which yielded a better and firmer candy).


I divided the liquid equally in two containers and added 1/4 tsp flavoring, 10 drops coloring each and mixed very well to incorporate.


I then poured the liquid into my 2 silicon molds and let set in the fridge overnight.


The next day I carefully peeled the gelatin from the mold


I placed it on the counter on a parchment paper sheet.


I then proceeded to cut it first into strips and then into small cubes (I often dipped the knife in warm water to help with the EXTREMELY STICKINESS).


I rolled the little cubes in white sugar to coat and to prevent them from sticking to each other


I carefully placed them on trays lined with more parchment paper. 


I then had to dry them to make them firmer and easier to handle/store. I covered them with a clean dish towel and put them inside the cold oven (to keep them safe from the furbabies). The first batch took FOREVER to dry. I am talking like more than a week, because I did not cook the simple syrup long enough -___-


The second batch, made with a thicker syrup, turned out much better. I only dried them for 2 days and they are prettier too. 


You can clearly see the difference here. The blue candy is so much crisper and prettier than the yellow candy. I am not going to lie, it drives my OCD nuts to see that the sugar is 'messy' around the yellow and orange candy, but it will have to go down as my messy 1st attempt o__O


I mixed the lemon, orange and vanilla flavored gummies in a large bowl, but I saved the mint gumdrops to package them alone. I did not realize that mint would be SO strong to even contaminate the other candies nearby, but that's what would have happened if I had packaged them together. The vanilla candy got a slight minty scent just by sitting in the same cold oven to dry for 2 days. Nuts!


I got some treat bags and some labels at Hobby Lobby (it is very important to use food grade containers and off course also flavoring, if using oils they MUST be food grade).


I placed about 1 cup of gummy gum drops per bag, I adhered the labels (before filling the bags) and I tied a cute ribbon around it. 

And that's it. Candies are ready to be gifted!
Happy 2016 peeps.


Saturday, December 26, 2015

Felt Ornaments Tutorial

'Tis the season for gift-giving and I am STILL trying VERY hard to gift as much handmade and up-cycled loving gifts as possible. It has been hard with my past semester's workload, but I had my mind set to do something for each one of my friends. So, I scoured the web to look for things that I could make as soon as I got on Christmas break.

I have always loved felt ornaments, and I knew they would be something I could accomplish easily, so I set out to buy some supplies from Hobby Lobby.


I got everything for 50% off, and also got some supplies that I did not use for this project (bells & sequins) but sometimes when I start a project my mind goes in one direction...when I truly end up taking a completely different path. This project was a bit side tracked, just like that. LOL. 


This is stuff that I truly used: some home-made cardboard shapes, felt, embroidery thread...


...and the ribbon spool from this image. ^__^  You may yet get to see the rest of the supplies, used later on for other projects. Who knows? With me it's always a surprise. HA!


This is how I made my heart pattern. I used an old cracker cardboard box and took advantage of the pleat. I drew my half hart on one side and cut it out, when I got the shape I liked. Drum roll...


...Tah-Daaaaahhhh symmetrical heart (with messy doodling all over it) created.


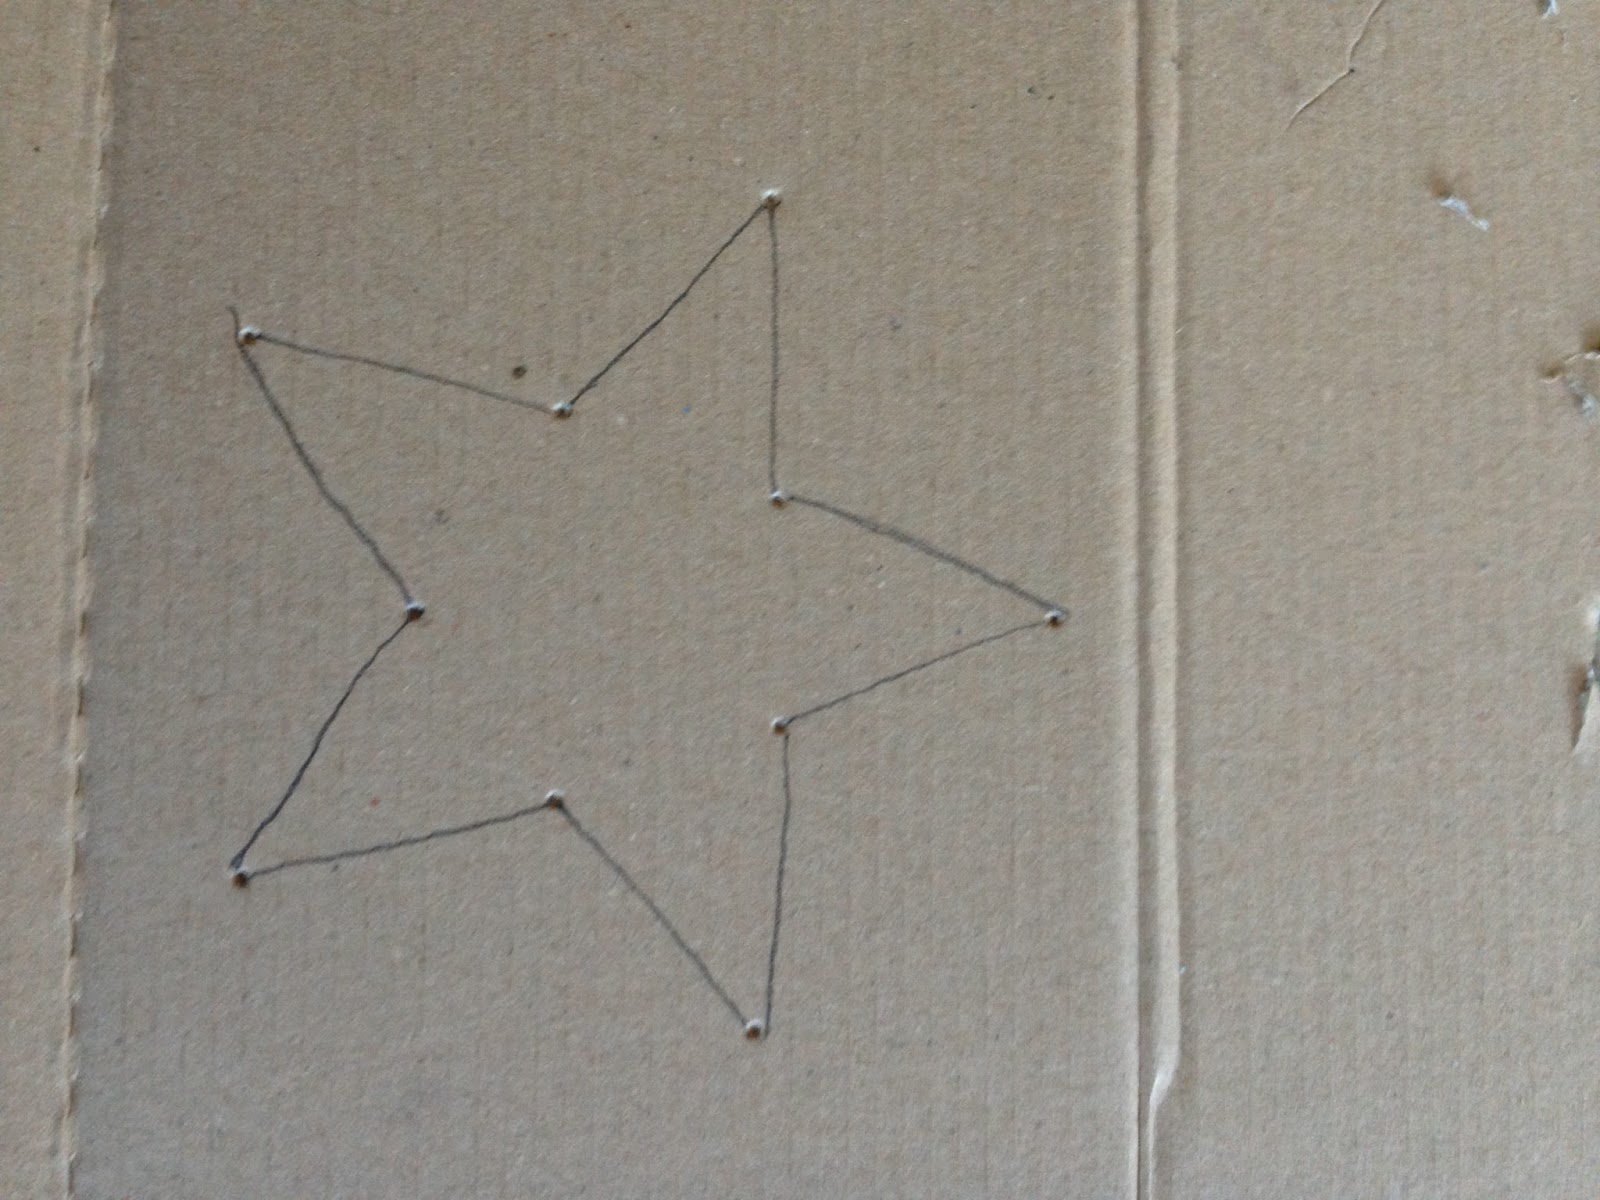
I repeated the process for the star poking holes at the correct distances then connecting the dots.


I then used the pattern to trace the shapes on the WRONG SIDE of the felt...


...and I cut them out. 


At this point I just free handed some very SIMPLE embroidery on half of my cutouts. YES, OFF COURSE THAT IS A CAT UNDER THE ORNAMENT. ^__^ How could it not be? The fur babies are always trying to help me with my projects and they make sure they put their stamp (a.k.a. hair) on all of my projects. But that's how we roll here...


I cut a piece of ribbon to the desired length and secured it in place with a few stitches. I wanted to make sure it would stay folded the way I liked it, with the print facing the ornament.


I then got a second felt heart, I matched wrong side with wrong side (right sides out) and I hand stitched the perimeters shut. I placed my ribbon sandwiched between the 2 layers of felt and stitched it in place making sure I got as many stitches possible through the ribbon.


I continued stitching all around the perimeter, leaving a small opening for stuffing.


...I used a mixture of simple stitching and blanket stitching for my perimeter (both are easy patterns to learn and tons of videos are available on youtube)...and YES, this is a different cat. LOL. They did take turns hogging my lap while I was sewing. They do get mesmerized by the thread and then fall into an hypnotic coma. O__o


I then stuffed the ornaments (and pushed the stuffing to the corners with fingers and a wooden skewer) and closed up the perimeter. That's about it. 


This is how they look in a grouping. 
I think they came out pretty good.
I gave one each to my Christmas guests as a small homemade token, hopefully they liked them.

Happy Holidays :)


Friday, December 18, 2015

Vegan Pumpkin-Coconut Bread Tutorial

So here I am...back after a long silence!
My semester has been so busy that I have not had time to post. However, I have crafted some stuff, so I will slowly try to update my blog with my summer/fall projects and with my current ones as well.

The holidays are here, and I found a great recipe for a healthy spiced bread that I wanted to share.

I found the original recipe at cakemerchant.com and I modified it slightly to our taste. I like that it is a "one bowl batter" so it's super quick to measure, mix and bake. Low maintenance food is my favorite!

(Makes one LARGE plumcake loaf, or a regular loaf + 6 muffins)

INGREDIENTS:

1.5 cups flour
1.5 cups dark brown sugar
1 tsp baking soda
1/2 tsp salt
1/2 tsp nutmeg
1 tsp cinnamon
1 cup pumpkin puree
3/4 cup cooled melted coconut oil
1/3 cup coconut milk
1/3 cup unsweetened shredded coconut
Garnish: 1 tbsp cinnamon sugar and coconut flakes (or shredded)


I added all my dry ingredients to the bowl: flour, baking soda, salt, sugar (I ran out of brown sugar so I added some regular organic sugar from Costco, right side of the bowl) and the spices...


...and mixed well.


Then I added my wet ingredients: pumpkin, coconut milk and melted oil...


...and mixed well.


My coconut milk was mostly solid, so I added some water until I got a batter with the right consistency. This batter is on the heavy side! I then added the shredded coconut and mixed well.


At this point I poured the batter into my loaf silicone mold. I love these molds as nothing sticks to them and it's super easy to peel the cakes from them retaining perfect shapes! Also, no buttering/greasing needed with those pans. Thumbs up to that!


I then sprinkled some coconut flakes to the top (shredded coconut can be used as well)...


...and I sprinkled some cinnamon sugar too.


I baked at 350 for 1 hour and 10 minutes (it will bake quicker at sea level) and that was it!


This is a great coffee cake for the holidays; it works well in a muffin form too. The muffins do cook quicker, since they are so much smaller. To make sure I was not burning them, I checked them often (around the hour mark) by inserting a wooden skewer into the center. When the skewer comes out clean, they are ready. 


Enjoy your holiday season! 


Thursday, July 2, 2015

How to Save "Dried-up Wood Filler"

It is summer time, and am nearly done with summer classes, so time has come to get back on the horse and work on some more projects! But as I go grab my beloved wood filler, I realize that Colorado dry weather has killed it! What has a girl to do, when she needs wood filler ASAP, and has a brick-in-a-box, you ask? Well, if it was old I would probably toss it. But I bought this 6 months ago...so I got dead bent into rescuing it instead! I figured that I had nothing to loose and tried my very best at resurrection! ^__^


Exibit A: caked, dried up wood filler -__-


I proceded to hack at the brick-o-solid with a butter knife 


I then used the back of a spoon to pulverize the clumps as much as possible...


...until I ended up with a smoothish powder


I added BOILING hot water (2 tablespoons to start with)...


...and mixed, mixed, mixed!


At this point it was better but still not the right consistency. I scraped the corners and the edges and gathered ALL the dry material. Now you see it...


...now you don't ^__^


I added one more TBSP (3 total by now) of boiling water and mixed some more. This is the result:


Perfect consistency wood filler. Just like new! 
I hope this is helpful in case this happens to you. Sometimes the solution is easier than you think!

Happy Summer!