Friday, January 29, 2016

Jewelry Trays Tutorial

This project has been a LONG one to say the least. I have been working on these trays for over a year now. It has not been a year long of 'true work'...more like on and off work (due to my schedule but also to the weather). So I am glad to have finally finished them and that they finally reached their destination. My friend C. called me today to say they had arrived in the mail and she seemed super excited about them! Yeay!


As it often is...this project begun at my local thrift store. You have probably seen tons of Monkeypod items in your local store, but may have never given them a second glance. I did too for some time, until I saw another blogger (jenniferrizzo.com) giving them a second chance at life. I thought they were pretty so, I gave it a go myself. When I shopped for this project I looked mainly at shapes and sizes. I wanted to have a cohesive group, but with different silhouettes.  


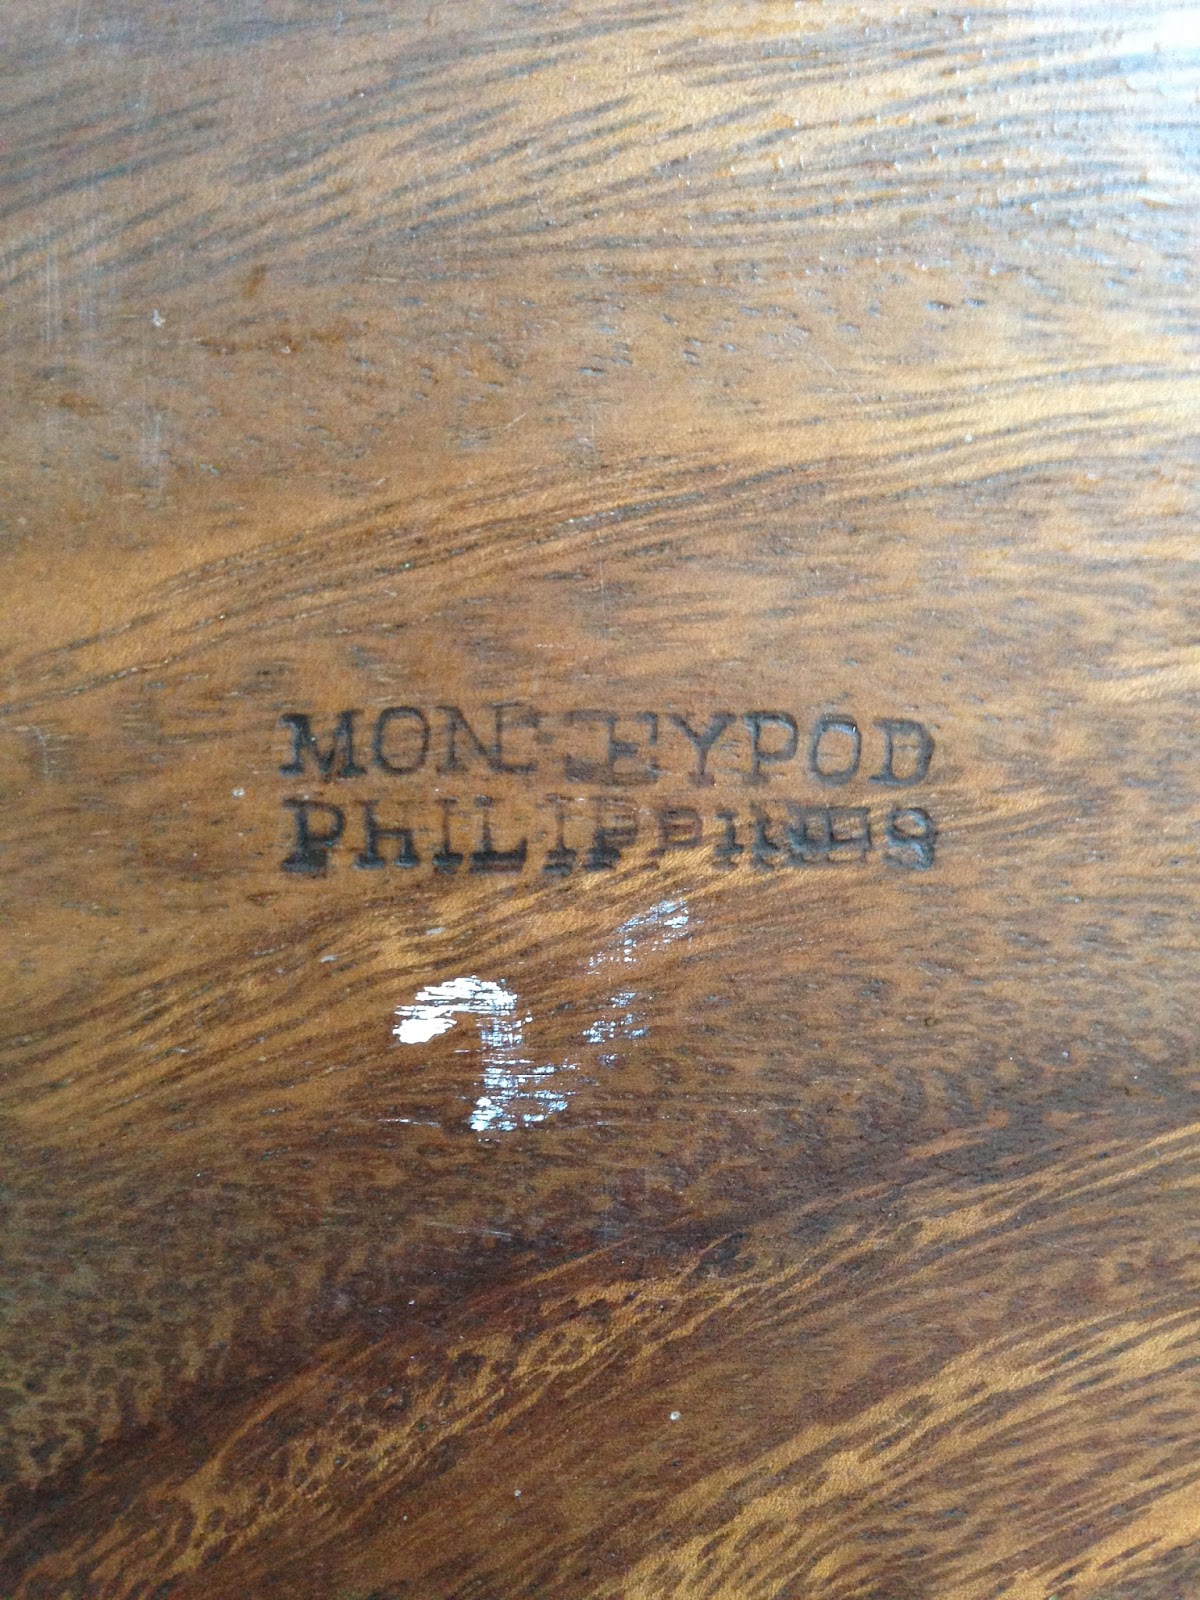
One of the bowls was marked on the underside. That's how I found out about Monkeypod! 


Without further ado I went to work on sanding these puppies inside and out. 


Here are the bowls all nice and scratched...


...and here they are after a good wipe down with a damp cotton rag. 


As with all of my spray paint projects, I primed the items twice...


...and then sprayed them with 2 thin coats of white paint. 

Ok, well...this is where the leaves fell from the trees, snow started falling. Then the snow melted and the the cacti bloomed, then we had a few wild fires in the county and FINALLY I got back on track and regained momentum with this project! 


I used some old plastic bags, and painters tape, to mask the areas that I wanted to remain white.


I then sprayed the silver on the exposed areas (Krilon as well, just in silver).


As soon as the silver paint dried (24hrs) I added more bags at a different angle over the original ones and I sprayed with the chosen colors. Really the most difficult part was to make sure I adhered the tape fully and tightly around the bowls, to avoid leaks and smudges. I did pretty good as most edges were very clean and crisp when I removed the tape. 


These are the 3 paints I used for the color blocking. Bauhaus Gold, Gumdrop and Jade, all gloss. As far as the white paint goes, I used the leftover I had from this previous project. No waste ^__^


I was pretty happy at how they turned out. I like the color blocking very much.


I took a few shots of them with some jewelry, just for fun.
Also, I made sure to let C. know that these are not safe for food. Spray paint is not something you want to be in contact with anything edible! 

What do you think?
Will you ever look at Monkeypod in the same way?
...I didn't think so! :-)


Sunday, January 24, 2016

Instant Gratification - Chair Reupholstering Tutorial

This must be one of the quickest project I have ever undertaken. I came across this lovely chair at my local second hand store (are you guessing which one? LOL) and I instantly fell in love with it! Mostly I love the shape of the backing. Not quite a heart, but enough to remind me of one, in beautiful condition and a nice enough finish. It was a great buy at $5.60 on half-off day. What a steal! 


Isn't she a beauty? 


What lovely little chair! 
I still can't believe that someone threw it out. But it's ok. I rescued it! ^__^


Well, yes, the seat needs some work. 
Not only is it boring, but it's also grimy O_o


Time to take this puppy apart!
Oh wait! I said puppy. Smokey will have to come to investigate! 
I can sense some jealousy in the air! 


I removed the 4 screws at the corners and the seat came off in a jiffy.


Ta-daaaahh! Sans-seat and ready to be scrubbed with a soapy/bleach mixture. I used about 1 TBSP of Dr Bronners and 1/4 TBSP of bleach in a bucket of warm water. I scrubbed the frame down, all over, and that was it. This chair was in pretty good conditions to start with, for a thrift find. So easy!

* * * * *

Ok well, soooooooo.....this is where things got a bit awry for the blog. -__- 

My mom called and in the mean time I kept on working...and talking on the phone aaaand...low and behold, I forgot to take photos of me cutting the fabric to size and stapling it to the cushion!
Ooooopsy Daisy!

Anyways, here are some info about those missing steps. 
1) In this case I wiped the original pink fabric with my soap/bleach mix to sanitize because 
2) I did not remove the original fabric (as it was the only thing keeping the batting in place and there was no need for new batting) but usually I do remove it by prying the original staples with a screwdriver, or an old knife.

Image courtesy of Amazon.com

3) The staple gun I used looks a lot like this one above, just a different brand. 
Before I knew it, I was all done, my chair was finished, and I was still chatting with my mom. 
It's a bit sad that I forgot to take some photos but hey, I love my momma and I don't get to talk to her often, so I think I can be forgiven! ^__^


So here is the final product. Super cute chair for my DH's music room.


...and here it is. In it's 'natural habitat', next to guitars, amplifiers, cords and all fun stuff!

Not too shabby I'd say for a project that took me about 2 hours from start to finish! 

Reduce
Reuse
Recycle 


Homemade (Facial) Shaving Cream Tutorial

I have been making this shaving cream for my better half for a while now. He seems to enjoy it, so during the holidays I decided to make several jars to gift to my friends' hubbies. This recipe is my own version of what I read online. I read extensively about how to make a shaving cream for men. Their face is much more sensitive than our legs (for ladies you can just use coconut oil, or even simple hair conditioner if you like). I read many recipes and, in the end, I chose ingredients from several...and came out with this mix. This recipe is for 1 jar. To make a larger batch I just multiplied the ingredients amounts for the number of jars I was making. Since I was making a several jars, I used both lavender and mint soap/oils for variety.


Ingredients for one jar:

2 TBSP Coconut oil
2 TBSP Shea butter
2 TBSP Dr. Bronner Castile soap
1 TBSP Raw honey
1 TBSP Bentonite clay
1 TBSP Castor oil
20 drops Vitamin E
20 drops Essential oil (I like to match soap fragrance to the same essential oil - mint with mint, lavender with lavender, etc - but you can also mix and match if you like)


I began by measuring out the ingredients and melting them in the microwave in 30 seconds increments. (This is enough coconut oil for my batch of 6 jars). 
YES, that's the perfect cup for me...and I love it! Kitties are always woven into my life = ^ .. ^ =


I poured the melted coconut oil into a mixing bowl


I measured and melted the Shea butter. 
(I melt solids in 30 seconds increments...so sometimes not everything is completely melted, but I mix well and eventually things do melt down. I don't want to nuke solids too long, because the longer you heat anything and the more you loose essential nutrients. So I truly nuke the bare-minimum necessary to obtain a fluid that will incorporate well with the rest of the ingredients).


The coconut and Shea butter combined...


...Honey and Castor oil added to the mixture...


...then Vitamin E, Castile soap and essential oils too (about to be thoroughly incorporated).


Then the clay is added...and roughly stirred before whipping.


To whip, I use a common hand mixer. I find that this gives me fluffiest consistency. I start on low and work my way up to high. I beat for about 2-3 minutes until the desired consistency is achieved.


I then scoop the shaving cream inside the containers (Hobby Lobby). I make sure the containers are clean and sterilized - dishwasher 'pots & pans' cycle works great - no preservatives in this recipe means that sterile jars are a must!


I then got some paper tags (on sale at Marshall's) and added a 'homemade with love' sticker to the front (from Hobby Lobby) and I wrote on the back of the tags "peppermint shaving cream" or "lavender shaving cream". 


I added a cute cotton ribbon, with mustache print, around the jars and added the tag. I let my friends know to always scoop the cream from the jar with dry, clean hands. You want to be a bit more careful with a natural product, without preservatives, to avoid molding or spoiling. You don't need to use much to do the job, my DH says that it takes about a teaspoon per shave, give or take.


Sunday, January 17, 2016

(Granular) Organic Chicken Bullion Tutorial

My home-made bouillon is one of my oldest blog posts. Mostly I just use it in its regular state, but I find myself making granulate for some recipes (like when I make my own spice mixes). So I thought I'd add this brief tutorial to show how I turn my 'regular' bullion into granulate.

If you have missed the original bullion tutorial you can find it here.


I started by spreading a thin, even coat of bullion on a cookie sheet lined in parchment paper.


I baked it at 200F (in 15 minutes timed increments). This part will be a bit different for every batch of bullion (as the water content may be more or less with each batch) and will depend on your elevation as well. It took me approximately 45 minutes to get it completely dry. During this process I stirred every time I checked on the timer, to make sure that everything was drying evenly.  


This is how the final dried bullion looked. I turned the oven off and just left the mix to 'cure' overnight in the cold oven.


The next day I got the clumpy powder into my Ninja...


...and I pulsed to blend until smooth. Can I just take a minute here and sing the praises of my FIL and MIL for buying me this awesome kitchen appliance? I am not sure if I could survive without it anymore. O__o Totally addicted. I use it ALL THE TIME! Best tool in my arsenal. Hands down!


This is how smooth the Ninja blends the powder into. Ah-mazing! Moving on...


At this point all that is left is just to pour the granular into a mason jar (or an air tight container) and store it in a cool, dry place (i.e. spice cabinet). And that's it. Not much work if you have the base ready! I like that the granular is also shelf-stable, so it does not need refrigeration...which could come handy also if you are out camping or if you want to ship it in the mail. 


Thursday, January 7, 2016

Thrifted Porch Decor

I know, this is not truly a tutorial.

I did not really MAKE anything, BAKE anything, PAINT anything...but I did up-cycle some items that were discarded by others, so I thought I'd share this mini project with you.

Around Thanksgiving, I realized how sad my porch looked. My summer pots were dead and dry, and my futile attempt to beautify the porch with a brand new pot of mums lasted exactly 48 hours!!! So sad! An early frost came and went and I was left with a porch looking like this:


I was so disappointed by it. Not only had I just spent $12 on one pot of flowers -that lasted less than 2 days- but I was also disheartened at the tough that if the mum had died, there was nothing else that could be planted till next spring. That's when I knew, that I needed decorations that were not going to suffer from the huge temperature ranges we regularly abide by in Colorado. 

I did not want to have Christmas decorations. I am too lazy to invest that much time for decor that will only be used for about a month. So I decided to find 'generic winter decor' and took a quick tour of my local ARC thrift store! It wasn't long before I found a set of awesome vintage skates for less than $5!


I thought of other items that I could pair with the skates to make a vignette for the porch and I was lucky enough to find a chair for about $5, a brand new south west fleece blanket for about $2 and a small winter wreath for 99 cents. Perfect! I came home and literally just dumped my finds on the porch. Since these will be outside exposed to the elements and wildlife, I figured I did not need to spend any time cleaning them. 


On the other side of the porch (more exposed to the elements) I just recycled a flower pot that my friend J.A. gave me this summer, filling it with logs, pine branches and cones. These WON'T wilt! ;-)


I think this set up looks pretty nice, especially today with the falling snow. I am also very interested in seeing the whole lot weathering. To me the chair is WAY too new right now, so I am looking forward to when it will be old and raggedy - baked by the sun and chipped by frost. 
The anticipations is killing me! ^__^


Here is an image of the whole chair. She is definitely not a beauty yet, but I have hope for the future. If the winter weather does not do much damage to it (it does sit under the eaves), I plan to just put it out back in the yard to bake over the summer. I bet that with the scorching summer sun it will bake to perfection! As you can see, I did go back to ARC and found a super cute iron lantern for $2 that I added to the grouping. I will keep on looking and add more 'junk' to the porch as I find more treasures.


I am pretty happy to have some sort of decor on my porch that can withstand the elements. I hope that this inspire you to go to your local second-hand store and to show some love to discarded items. I can't believe how consumeristic our society has become, and hope that more and more people will embrace my spirit.

Reduce
Reuse
Recycle