Thursday, May 9, 2013

Chairs reupholstering tutorial


My poor dinette has seen better days. It's been with us for 12 years now, through 4 moves and still going. It was in dire need for a makeover and today I gave it one! I found the fabric at JoAnn's for 50% off of $19.99 a yard. It's outdoor fabric so it should take well to wear and tear.

Here is a shot of the old cushions. The fabric was still nice, it just didn't go with the colors we chose for this kitchen. So off goes the old, in comes the new.


First off I unscrewed the chair pad from the frames.


Then I carefully removed all the old staples and fabric. You can skip this step if you like, but since this is the 4th time I reupholster these chairs, I always take off the old fabric so I don't build up too much. Next I laid the old fabric on my new fabric, and cut a piece about 1 inch or 2 larger than my old ones (you can always trim but you can't add fabric!). I trimmed off a bit too much last time ;)


Then I laid my cushion over the fabric (wrong side up). If you have a directional pattern, like I did, you need to make sure that the pattern is also going the correct way (or my birds would have ended up upside down LOL).


From now on it was a whole lot of making sure the fabric is taught and stapling it in place.


I like to staple two opposite sides, before I move on to the 3rd and 4th side. Here I started with the front and the back of the cushion, but then I realized it was better to start with the sides, since they are a bit slanted.


Once the first two sides were stapled nicely, I moved over to the corners. I made regular pleats (3 per corner), gathered the fabric to make it taught and stapled in place. If you are new to this, you can staple down each pleat as you fold. I try to avoid over-stapling since I know that, sooner or later, I will be removing those staples and cursing along ;)


Once all your cushion is done you can trim the excess fabric.


At this point I cut some slits or holes where the screws would fit into. You can usually 'feel' the holes with your fingertips. If you don't do it, and the fabric you have is not super thick, you may end up getting snags in the fabric (screws pulling the weave). 


And that's all folks. I repeated the process 4 times and this is the final product. Same sad dinette, cuter seats! I am planning to use this fabric to sew a table runner, a window valance and possibly lengthening my current sliding doors curtain panels. I will keep you posted on the progress.


I hope you enjoyed this tutorial. Happy reupholstering!


Tuesday, May 7, 2013

Embellished Curtain Panels Tutorial


Slowly but surely I am getting back to the swing of things and to my projects. Next in line, for the past 2.5 months, has been embelishing a pair of Ikea MERETE panels for my DH music's room. 
Photo courtesy of Ikea.com
I have tried to purchase curtains at discount stores, but I could only find 84-86" length, VERY narrow panels. Ikea was the only affordable place to get curtains that were both long and wide enough to cover my windows. I chose these white panels, I had them in my cart when I crossed the isle to the fabric section, and low and behold the sky opened! Guess what was in the discontinued sale bin? This!!!
Photo courtesy of Ikea.com
If this is not serendipitous I don't know what is! Music room anyone? 
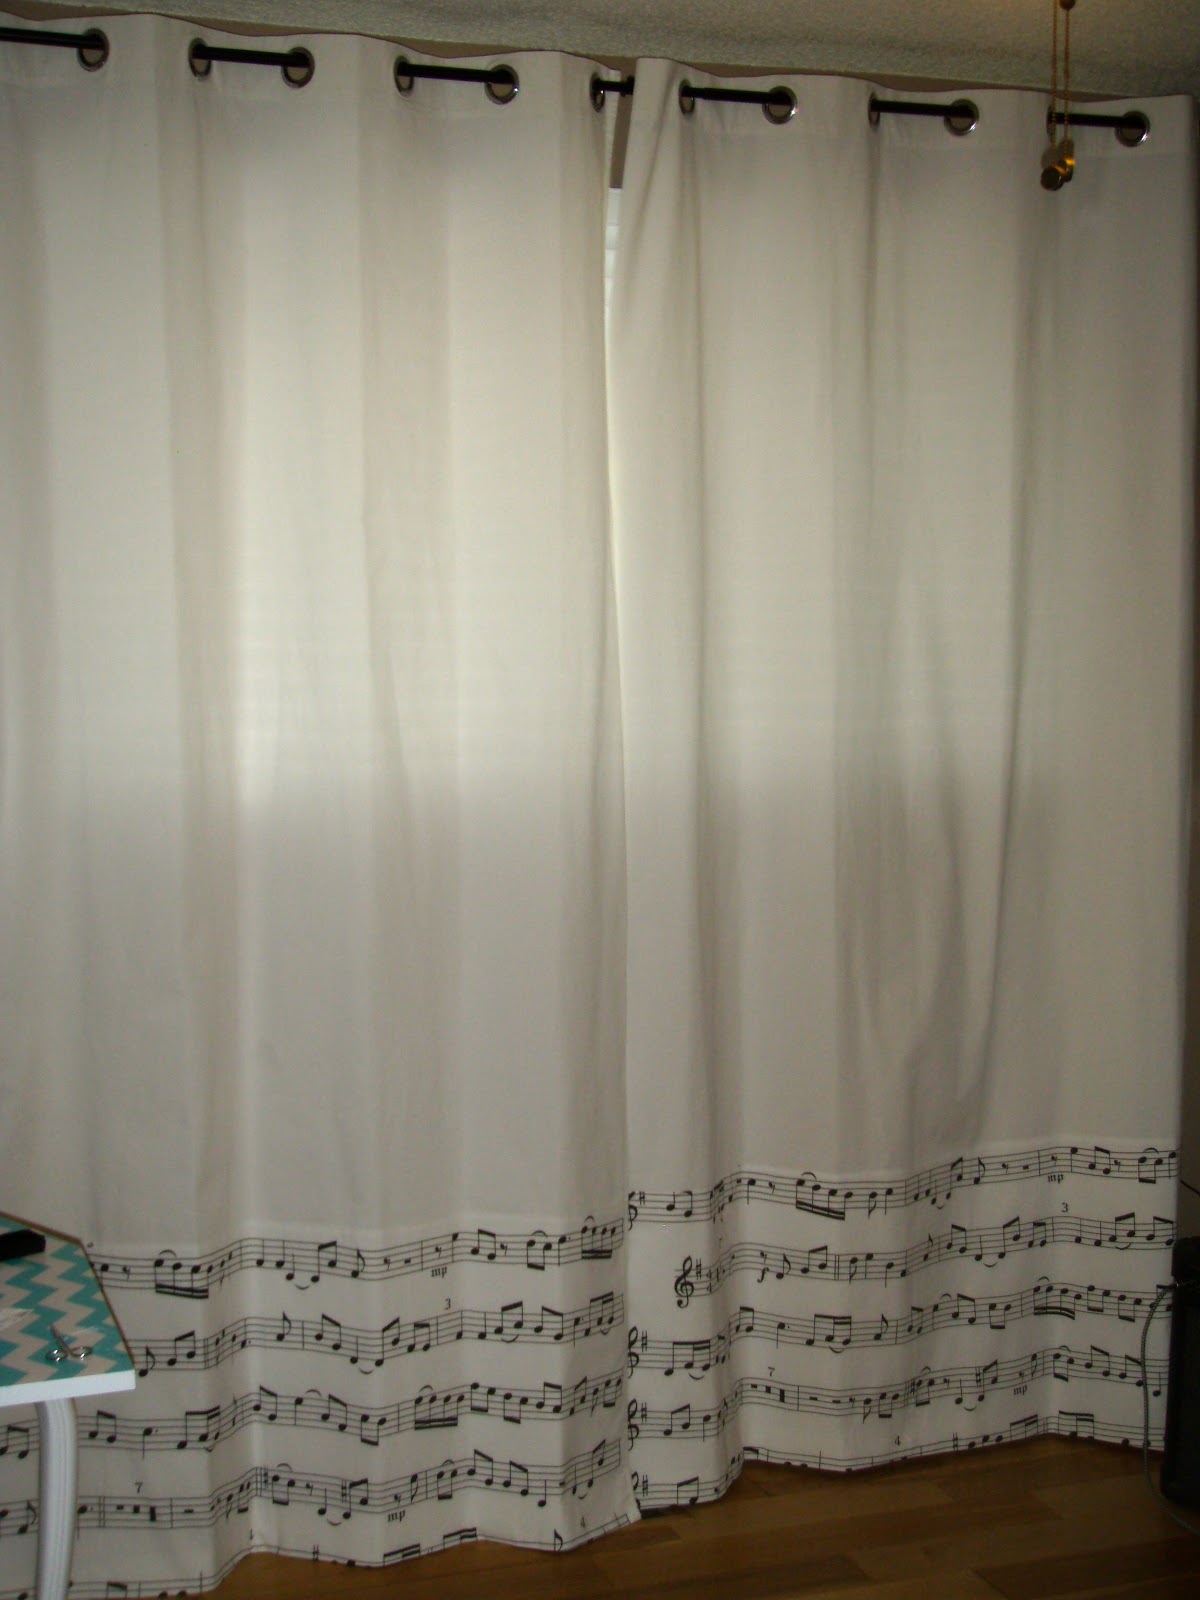
I paid less than $5 a yard and this ended up to be the perfect missing link in the equation. Something that will infuse some print into the room, but still remains subtle enough not to overwhelm the tiny space. The fabric is lightweight and perfect to add as a border to the panels. So I got to work. 
First off I washed, dried and ironed the curtains AND the music fabric. I was afraid of having the two fabrics shrinking later and making a pulling/puckering mess!
I laid out my fabric on the floor over the panels just to figure out how thick of a band I wanted. 
Rufus is always quit the helper!


With a size in mind, I proceeded to cut my panels. Tip: if you make a small cut and then tear the fabric, the weave will make you go straight and you will save much time! PS: never mind my ugly hands, I was also simultaneously working on a paint job. Oil paint does ugly things to hands! -__-


I made sure both panels were of equal width, then I cut and tore the second one.


At this point I laid the printed fabric face down (wrong side towards me) in the "middle" of the panels. Keep in mind that my plan here was to make a straight stitch on the lower portion of the music fabric. Then I'd flip the fabric down and blind stitch over it, for aesthetic reasons. I had to do quite some thinking, to make sure that the print would face the correct way. It contains script, so it is crucial for it not to be upside-down! Smokey was also happy to lend a paw in the process ^__^


Here is the lower part of the music fabric pinned to the panel and ready to be sewn.


Straight stitching the panel in place.


This is what the straight stitch looked like.


Then I flipped the fabric over and blind stitched on the right side of the print. Now that the fabric has been flipped over, I am stitching on the top of the music panel. I hope this makes sense.


I laid the curtains flat one more time, I folded over twice the sides of the music fabric, pinned it in place and straight stitched it.


This is what the stitching looks like on the right side of the curtain panel.


For the hem I decided to just do a straight stitch (to keep the curtains and the panel together) since I would be hemming using the enclosed Ikea hemming tape. I am always thinking ahead...what if we move and I need longer panels? Easier to let the hem down with hemming tape! ;)


At this point I hang my curtains up and pinned to desired length.


I then took the curtains down and got ready to ironing the hemming tape. It's hard to see with the white on white, but all that was needed was to tuck the hemming tape under my pinned fabric...


And then press over it. Easy peasy.


I then re-hung the curtains on the rod and admired my handy work. Here are the panels completely closed.


And this is how they look when they are open.


It's hard to take a good photo of a window, with the direct light coming in...but this is another shot.


With time I am planning to use the rest of the music fabric to make other accessories for the room (pillows, maybe modge podge a box and so on).
Now, time for your very own creations!


Sunday, May 5, 2013

Plug in Air Freshener Tutorial


Don't you just love a nice fragrance filling the air, when you return home, after a long day's out? I sure do. I am always paranoid of my house smelling badly. I do open the windows, weather permitting, and I do keep smelly culprits away, as much as possible...but I always yearn for that good smell. 

Enters the plug in air fresheners. I used to buy those guys all the time, and I used to love coming home to fragrant lavender fields, or rose gardens, or fresh linens. That was, until I found out the evil of plug ins and air fresheners!

According to www.mcs-global.org in 2002, EPA researchers (testing air freshening units that plug into electrical sockets) determined that, when the fragrance chemicals in these products react with common indoor air pollutants, they produce serious health hazards. These chemicals include toxic substances such as: benzene derivatives, pinene and limonene, aldehydes, phenol, and cresol.

Pinene and limonene react with ozone, a common outdoor and indoor air pollutant, creating formaldehyde and a variety of related chemicals which have been implicated in multiple chemical sensitivity and respiratory distressAir freshener chemicals have been implicated in cancer, neurological damage, reproductive and developmental disorders, and other conditions. The synthetic chemicals in air fresheners also can aggravate asthma and/or trigger attacks. MMMM, DOES NOT SOUND GOOD!

Researching air freshener/plug-in ingredients, from their Material Safety Data Sheets, the following were found to be toxic:


Benzyl Alcohol “...upper respiratory tract 
irritation, headaches, nausea and vomiting, a depressed central nervous system and a drop in blood pressure.”

Camphor“On EPA's Hazardous Waste List... readily absorbed through the body tissues...irritation of eyes, skin, nose, and throat...dizziness, confusion, nausea, twitching muscles and convulsions...avoid inhalation of vapors.” (MMM...THE PLUGIN DOES NOTHING BUT VAPORS!!!!)
Dichlorobenzene-- “extremely toxic, a central nervous system depressant, kidney and liver poison. One of the chlorinated hydrocarbons that is long-lasting in the 
environment and is stored in body fat. Vapor irritating to skin, eyes and throat. Banned in California.”
Ethanol-- “... derived from petroleum and is carcinogenic... toxic to the skin, respiratory, cardiovascular, developmental, endocrine, neurological, and gastrointestinal systems.”
Formaldehyde-- “...toxic if inhaled, poisonous if swallowed, skin and eye irritant, carcinogenic...”
Limonene—“ ...Carcinogenic, prevent its' contact with skin or eyes because it is an irritant and sensitizer ...always wash thoroughly after using this material and before eating or drinking...do not inhale limonene vapor". (MMM, VAPORS MENTIONED AGAIN?!? NO BUENO!)
Naphthalene-- “... a carcinogen that accumulates in our waters and marine life. It can be irritating to the skin, alter kidney function, cause cataracts, and is toxic (cardiovascular and developmental), especially to children. It can be poisonous if inhaled, swallowed, or absorbed through the skin.
Phenol-- “...can cause skin to swell, burn, peel, and break out in hives ... cold sweats, convulsions, circulatory collapse, coma and even death. (DEATH YOU SAY?? O.o)
Pinene-- “...Flammable. Incompatible with strong oxidizing agents. Eye, skin, & respiratory irritant. May be absorbed through skin...very destructive of mucous membranes.

So, this is how plug-ins got plugged-out of my sockets and ended up in a box at the back of my closet. Although my mind knew that plug ins were evil, my heart still yearned for that fresh homey scent. So I researched online, and I found that many people were already doing what I had only suspected to be possible: refilling the plug-ins with 100% natural essential oils. Awwww, I am a happy camper again! This is how it works.

I got my old plug-in, a vial of lavender oil that I had in hand, and a knife. With the knife I forced the plastic cap (and wick) off of the glass jar, you may also use a screwdriver for this if you have nice knives. The wick is purple, as the last freshener was lavender and off course mounds and mounds of chemicals MUST be used at all times to impress buyers! :( 
If you want to, I have seen youtubers opening the plastic lining, removing the fiber wick, washing it, and then reassembling the whole thing using clear tape in place of the plastic liner. It did however, not look the same once it was 'jerry rigged' like that. The wick was not as tight, it looked a bit 'fluffy'. So until I find a better solution I will be using the original wick. I am hoping that with time the wick will saturate completely with the essential oils and the yucky stuff will dissipate...fingers crossed. I am keeping the house well ventilated in the mean time...to make sure we are breathing the least amount of residue left on the wick. 


At this point I filled the plug in glass receptacle with 1/3 of essential oil


I then filled the bottle with 2/3 water making sure not to fill it to the brim. Leaving at least 1 inch to the opening, assures that once the wick is re-inserted the content won't overspill.


At this point I re-inserted my wick (and later snapped it in place).


And finally I put my bottle back onto the plug-in and stuck it into the socket. 
Awwwwwww! I love it.


The scent is not as strong as the commercial ones. But I can definitely smell the lavender in my dining room and the Eucalyptus in the bedroom. I love it and now I am hooked. 

Now go and get yourself some essential oils and hack your own plugins. If you check your local natural store, you should be able to get some on sale. I just got a very large bottle from Sprouts Market for $11. Whole foods for sure has some too, and I bet Trader Joe's does as well...but I will have to wait a few more months for IT to open in Denver. 

Happy smells to you all! ^__^


Wednesday, April 3, 2013

Writing Desk Upcycle


No, things are not really back to normal yet. I still have a full house, and I am still on a project hiatus. However, I did have another piece that I finished a month or so ago that I have yet to post. So this morning, since I have the chance, I am uploading the photos for your viewing pleasure ;)

I have been wanting to get a desk, for my DH's music room, for a while and this came up on Craigslist (you guessed it) for $13! So I took a chance and gave it a new look. Initially, I wanted to paper the drawer's front ONLY and paint the piece a turquoise blue...but DH vetoed my color choice and settled on white...how risky! LOL. Anyways, it's HIS desk, in HIS room, so he should have the chance to choose what he wants! So white it is, my friends!

This is what I started with. A dingy, dirty little corner desk. The shape is a little odd, but I love the style, so I gave it a go...given the price!


Here is a front view. Some chips and lots of dirt...but good bones after all!


As always I washed it with a bleach/water/soapy solution, dried it, lightly sanded it, wiped it and vacuumed it. Then I proceeded to spray-prime it (with this). Since this desk had carvings, spraying it worked best. To elevate the piece, and get an even coat on the legs, I put thick nails under the feet.


Here you can see how this works. This trick allows me to easily paint the entire leg.


This is the piece with two coats of primer (I did not do anything to the table top, nor the inside of the drawer as I knew I was going to paper them).


This is after I spray painted it with two coats of white paint.


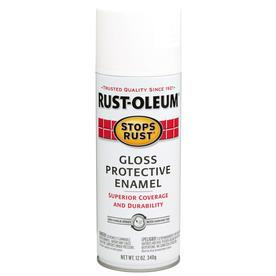
This it the paint I used on this piece, since I had it in hand.

Photo courtesy of Lowes.com

At this point I had to paper the front of the drawer, as for my humidifier, I measured the paper and cut it to size allowing for trimming.


I adhered the paper, making sure there were no bubbles, and then used the back of my utility knife to tuck the paper tightly into the corners.


Then I very carefully trimmed all the excess at the corners.


Then i pushed the liner gently over the hardware holes to expose them, and I made incisions to allow easy hardware install.


At this point I lined the inner drawer. I wanted the print to run horizontally, so I begin with the front and back. 


Then, with one single sheet of paper, I lined the sides and bottom of the drawer.


At this point I re-installed the knobs, which I had painted with my favorite rubbed bronze spray paint from Rustoleum (see this post). I was running out of time (my friends were about to move-in and I needed to be done), so I opted to paper the top as a quick solution. I measured carefully, and matched the print to perfection, before adhering it. I had to use two sheets and matching the pattern perfectly was the only option. It was a bit time consuming, but worthwhile. Once I had my 'dry run' perfected, I started to peel off my backing. When all the liner was perfectly stuck, I trimmed the excess off.


 And this is the finished product. I still am not sure if I like this much print or not. I will live with it, for the time being, and possibly update it in the near future.


Here is a side view. What do you think? Too much of a good thing? Chevron overload? ;)


I do like the print a lot on the drawer insert! I think it's just what the doctor's ordered...pun intended!


And here is a view of the inner parts of the drawer. I do love lined drawers! ^__^
Ummm...as per my tradition, here is where you can see my mistake. I should have known better and painted the outer sides of the drawers! But as I always say: nothing is perfect! ;)


So what do you think? Should I keep the chevron printed top, or should I just paint it solid white? Comment below and let me know what you think! Happy