Writing Desk Upcycle
No, things are not really back to normal yet. I still have a full house, and I am still on a project hiatus. However, I did have another piece that I finished a month or so ago that I have yet to post. So this morning, since I have the chance, I am uploading the photos for your viewing pleasure ;)
I have been wanting to get a desk, for my DH's music room, for a while and this came up on Craigslist (you guessed it) for $13! So I took a chance and gave it a new look. Initially, I wanted to paper the drawer's front ONLY and paint the piece a turquoise blue...but DH vetoed my color choice and settled on white...how risky! LOL. Anyways, it's HIS desk, in HIS room, so he should have the chance to choose what he wants! So white it is, my friends!
This is what I started with. A dingy, dirty little corner desk. The shape is a little odd, but I love the style, so I gave it a go...given the price!
Here is a front view. Some chips and lots of dirt...but good bones after all!
As always I washed it with a bleach/water/soapy solution, dried it, lightly sanded it, wiped it and vacuumed it. Then I proceeded to spray-prime it (with this). Since this desk had carvings, spraying it worked best. To elevate the piece, and get an even coat on the legs, I put thick nails under the feet.
Here you can see how this works. This trick allows me to easily paint the entire leg.
This is the piece with two coats of primer (I did not do anything to the table top, nor the inside of the drawer as I knew I was going to paper them).
This is after I spray painted it with two coats of white paint.
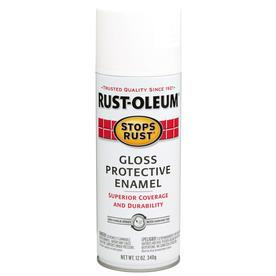
This it the paint I used on this piece, since I had it in hand.
 |
| Photo courtesy of Lowes.com |
At this point I had to paper the front of the drawer, as for my humidifier, I measured the paper and cut it to size allowing for trimming.
I adhered the paper, making sure there were no bubbles, and then used the back of my utility knife to tuck the paper tightly into the corners.
Then I very carefully trimmed all the excess at the corners.
Then i pushed the liner gently over the hardware holes to expose them, and I made incisions to allow easy hardware install.
At this point I lined the inner drawer. I wanted the print to run horizontally, so I begin with the front and back.
Then, with one single sheet of paper, I lined the sides and bottom of the drawer.
At this point I re-installed the knobs, which I had painted with my favorite rubbed bronze spray paint from Rustoleum (see this post). I was running out of time (my friends were about to move-in and I needed to be done), so I opted to paper the top as a quick solution. I measured carefully, and matched the print to perfection, before adhering it. I had to use two sheets and matching the pattern perfectly was the only option. It was a bit time consuming, but worthwhile. Once I had my 'dry run' perfected, I started to peel off my backing. When all the liner was perfectly stuck, I trimmed the excess off.
And this is the finished product. I still am not sure if I like this much print or not. I will live with it, for the time being, and possibly update it in the near future.
Here is a side view. What do you think? Too much of a good thing? Chevron overload? ;)
I do like the print a lot on the drawer insert! I think it's just what the doctor's ordered...pun intended!
And here is a view of the inner parts of the drawer. I do love lined drawers! ^__^
Ummm...as per my tradition, here is where you can see my mistake. I should have known better and painted the outer sides of the drawers! But as I always say: nothing is perfect! ;)
So what do you think? Should I keep the chevron printed top, or should I just paint it solid white? Comment below and let me know what you think! Happy


No comments:
Post a Comment