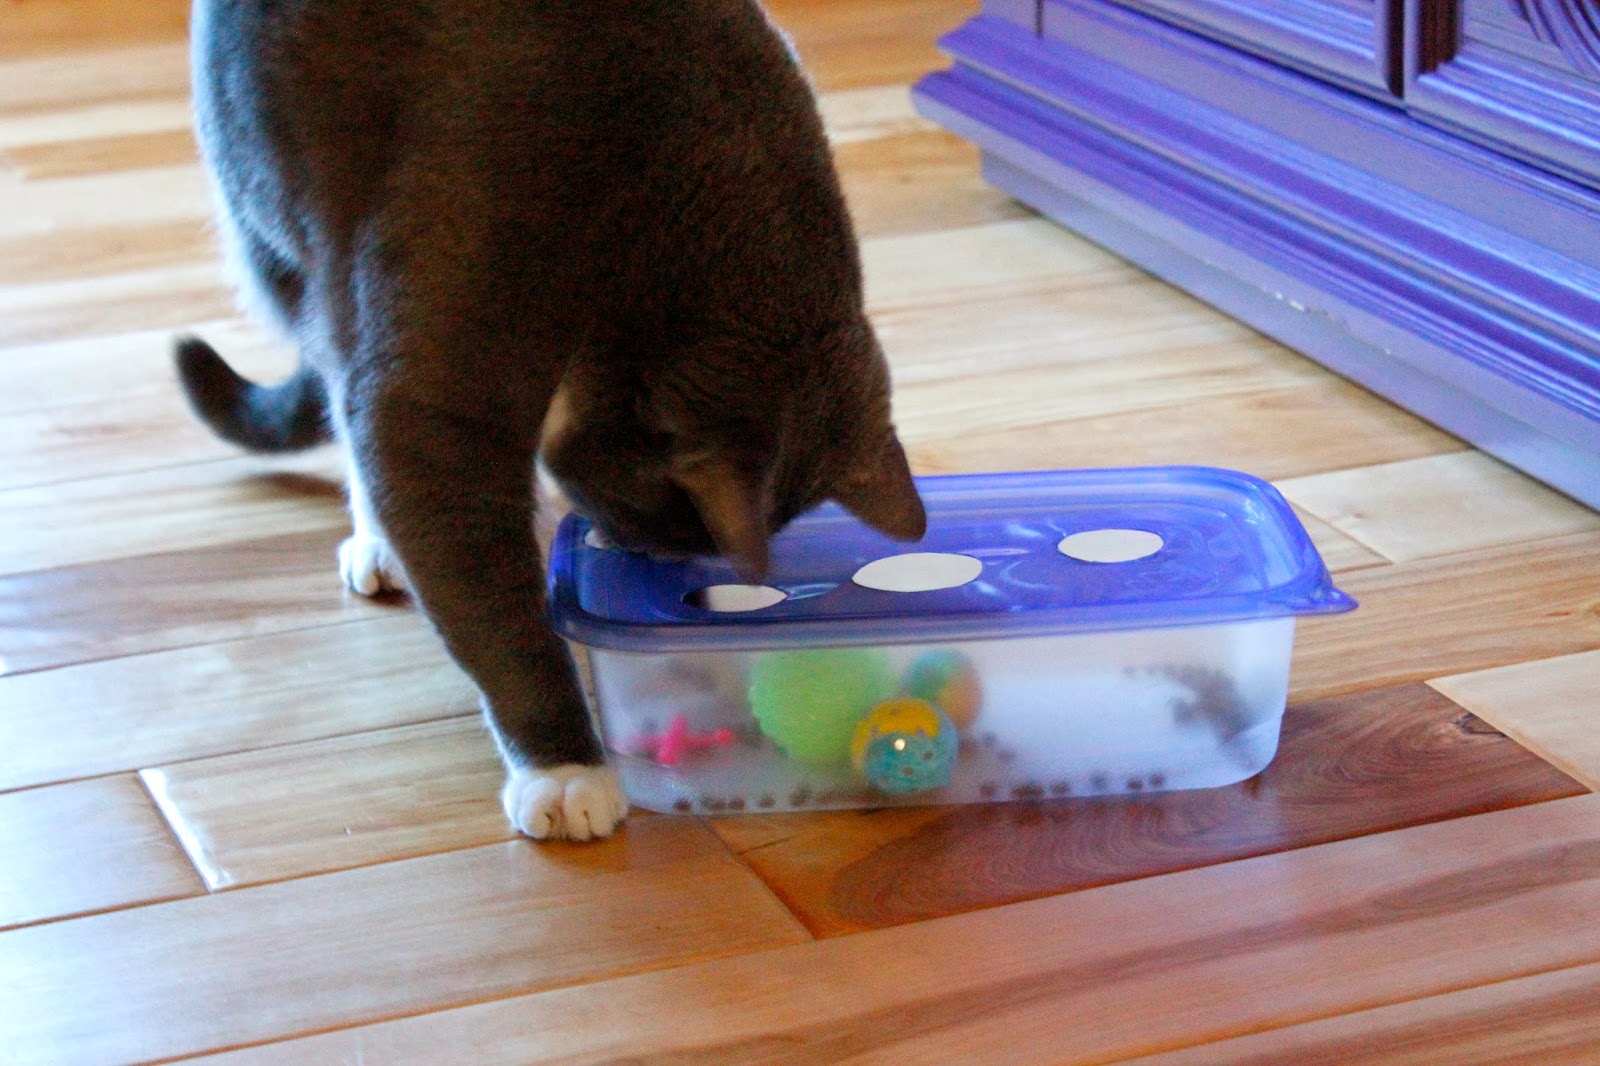
If you know me, you know that I am totally addicted to my two cats: Smokey Bones & Felis Lynx Rufus. I always try to improve their environment, and make up for the fact that I can't let them out here in Colorado. I have been reading a whole lot about cat puzzles lately, and on the web I saw many viable commercial options that could be easily made into a do-it-yourself project. So off I went, to get some supplies, and here is the result of my efforts. Smokey is modeling the result for you here.
Supplies List:
- One (or more) disposable food containers
- Utility knife
- VERY sharp scissors
- Black marker
- Rubbing alcohol
- Lighter
- Small rubber adhesive casters
- Small cat toys/balls (at least one with a bell - for stimulating sounds)
- Cat kibble or treats
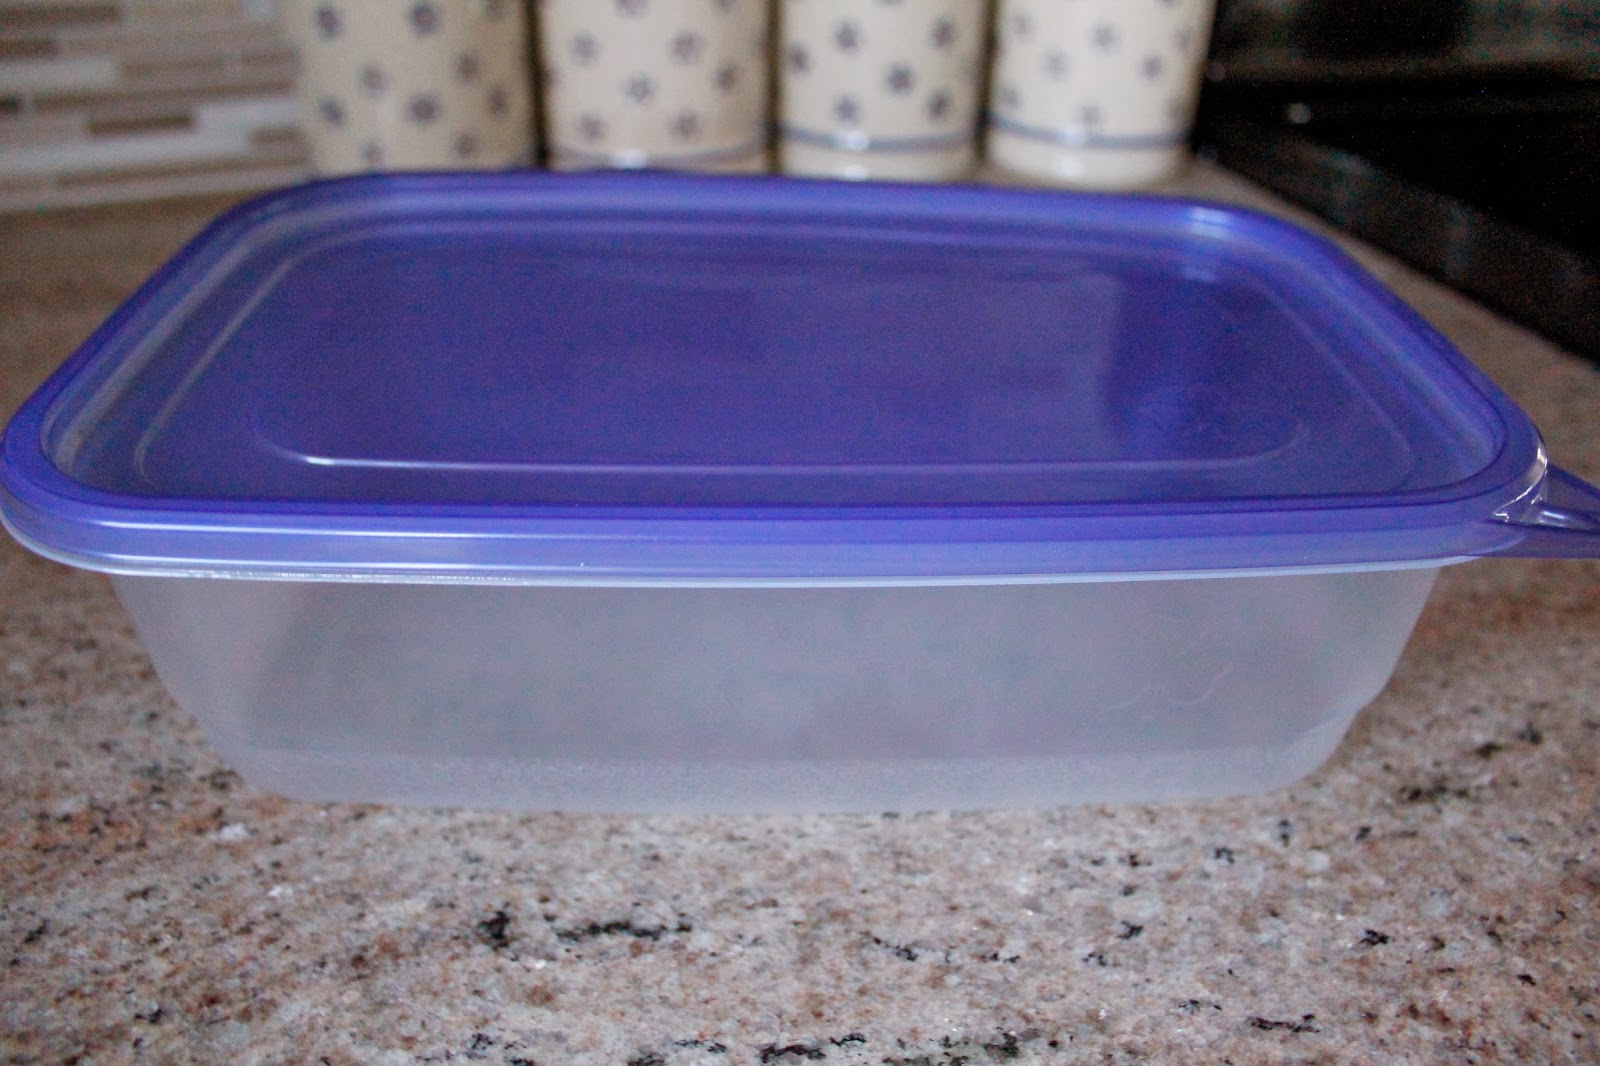
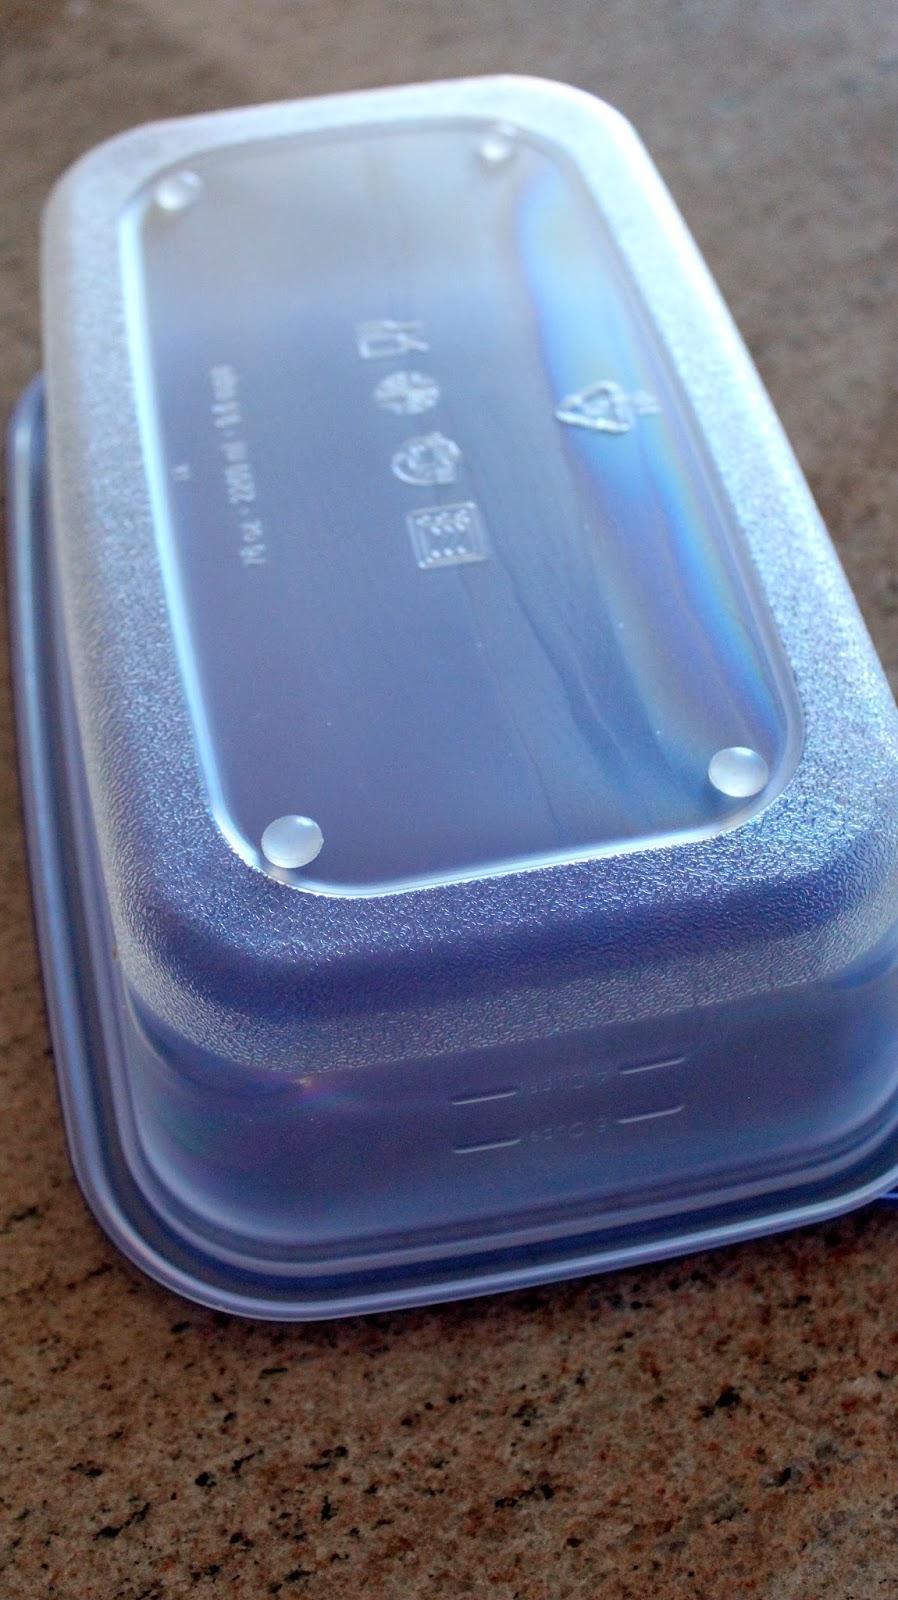
Here is my starting piece. A food container of about 9½ cups capacity. A larger size would be nice, but smaller than this wouldn't probably work. I purchased a pack of 2 at King Sooper (Kroger brand) on sale for $1.99
I flipped the container upside down, and I secured some rubber adhesive casters - to help stabilize the puzzle on my hardwood floors.
I used shot-glasses to draw my shapes onto the lid with a black marker.

I put the lid onto a wooden cutting board, and I scored X shapes inside my circles with an x-acto knife. I used these openings to insert the scissors and cut out the circles.

After cutting all my openings, I removed the leftover black marker with some rubbing alcohol.
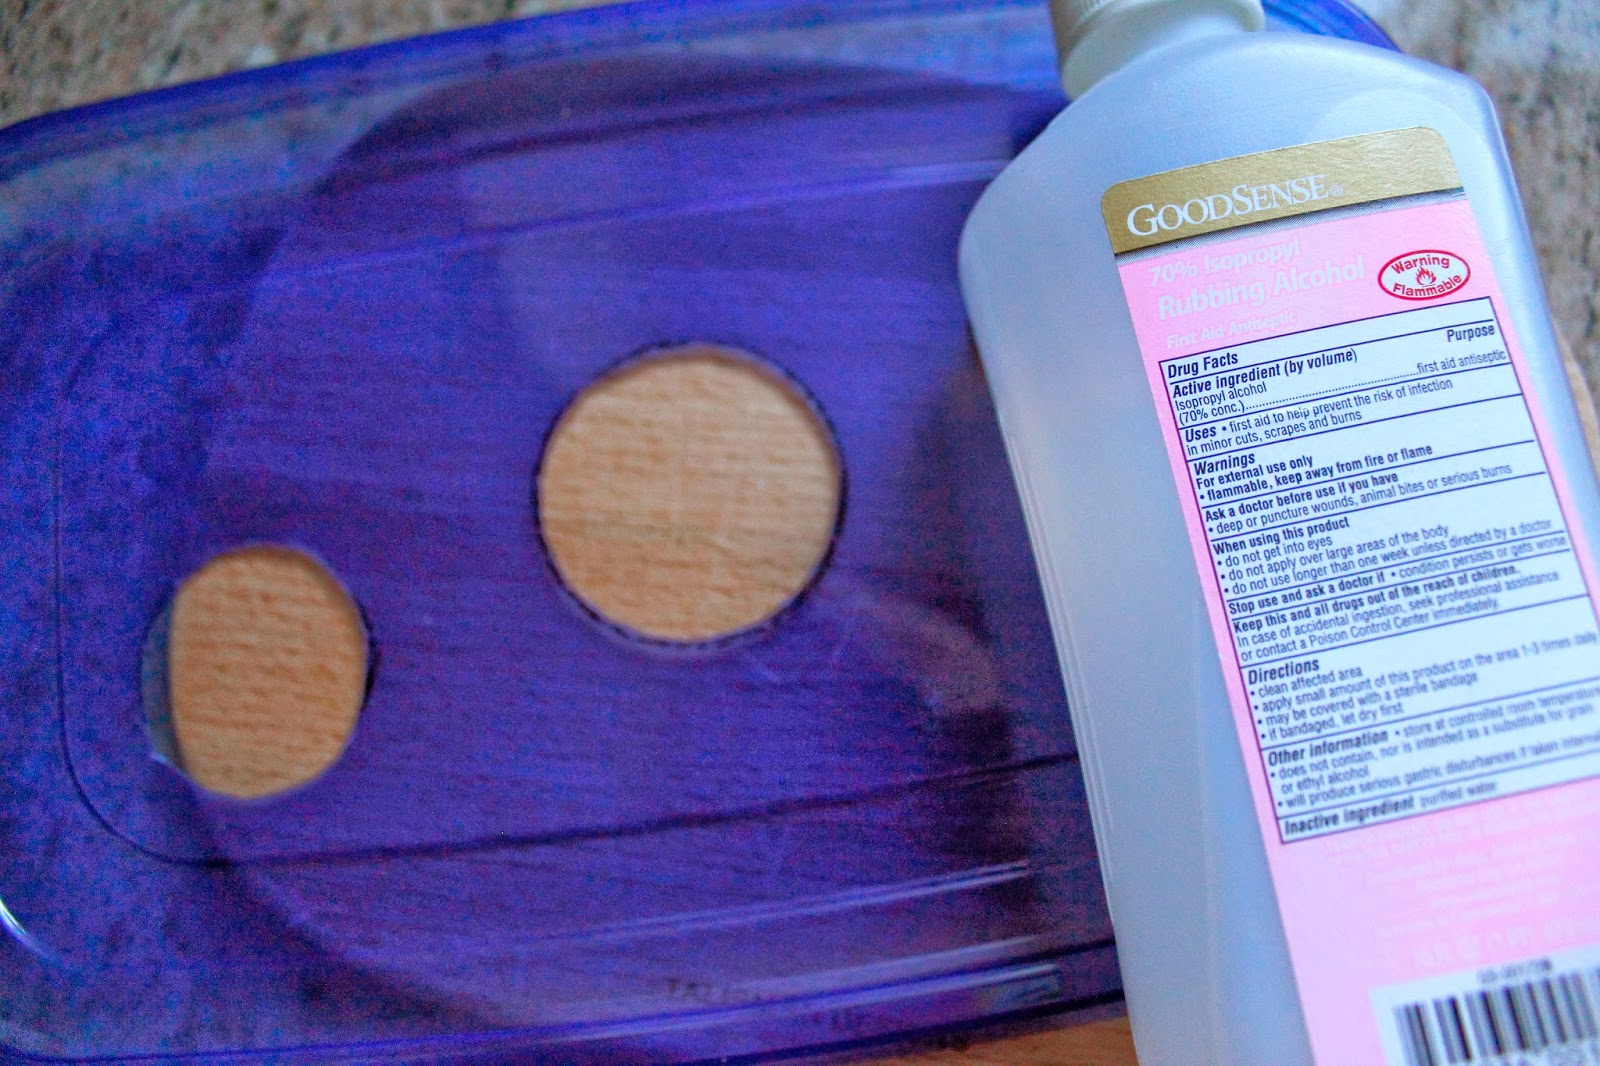
I then burnt the edges, of the openings, to smooth them out (paws and jagged edges don't go together!)

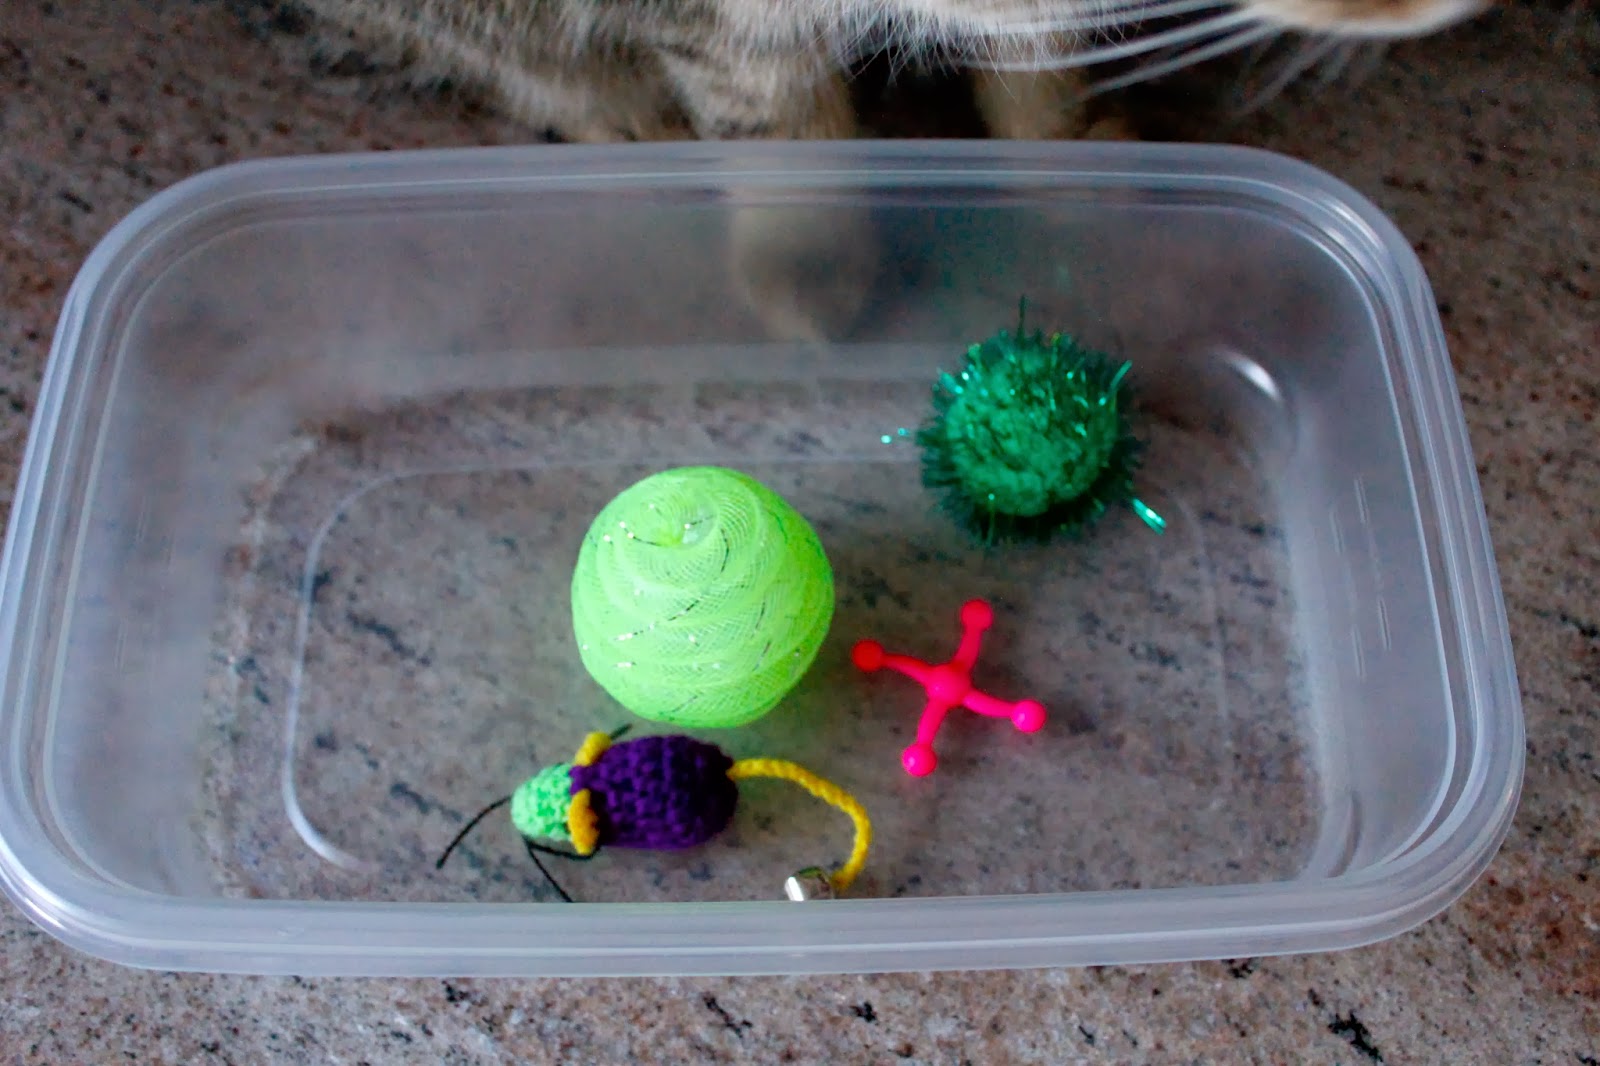
At this point I gathered some old toys and put them into the container. Rufus is supervising the work, to make sure I do it right! You don't need to buy toys for this project. The point is to make it affordable! So you can use old toys you already own, or make your own - with found objects. You can use the plastic safety ring from a milk jug, you can crumple-up some paper and make paper balls, or you can even use buttons or items that your cat naturally plays with. I would advise to have a bell in the box...just for extra auditory stimulation. I used two bells, one is inside the larger lime ball, and one is attached to the mouse's tail.
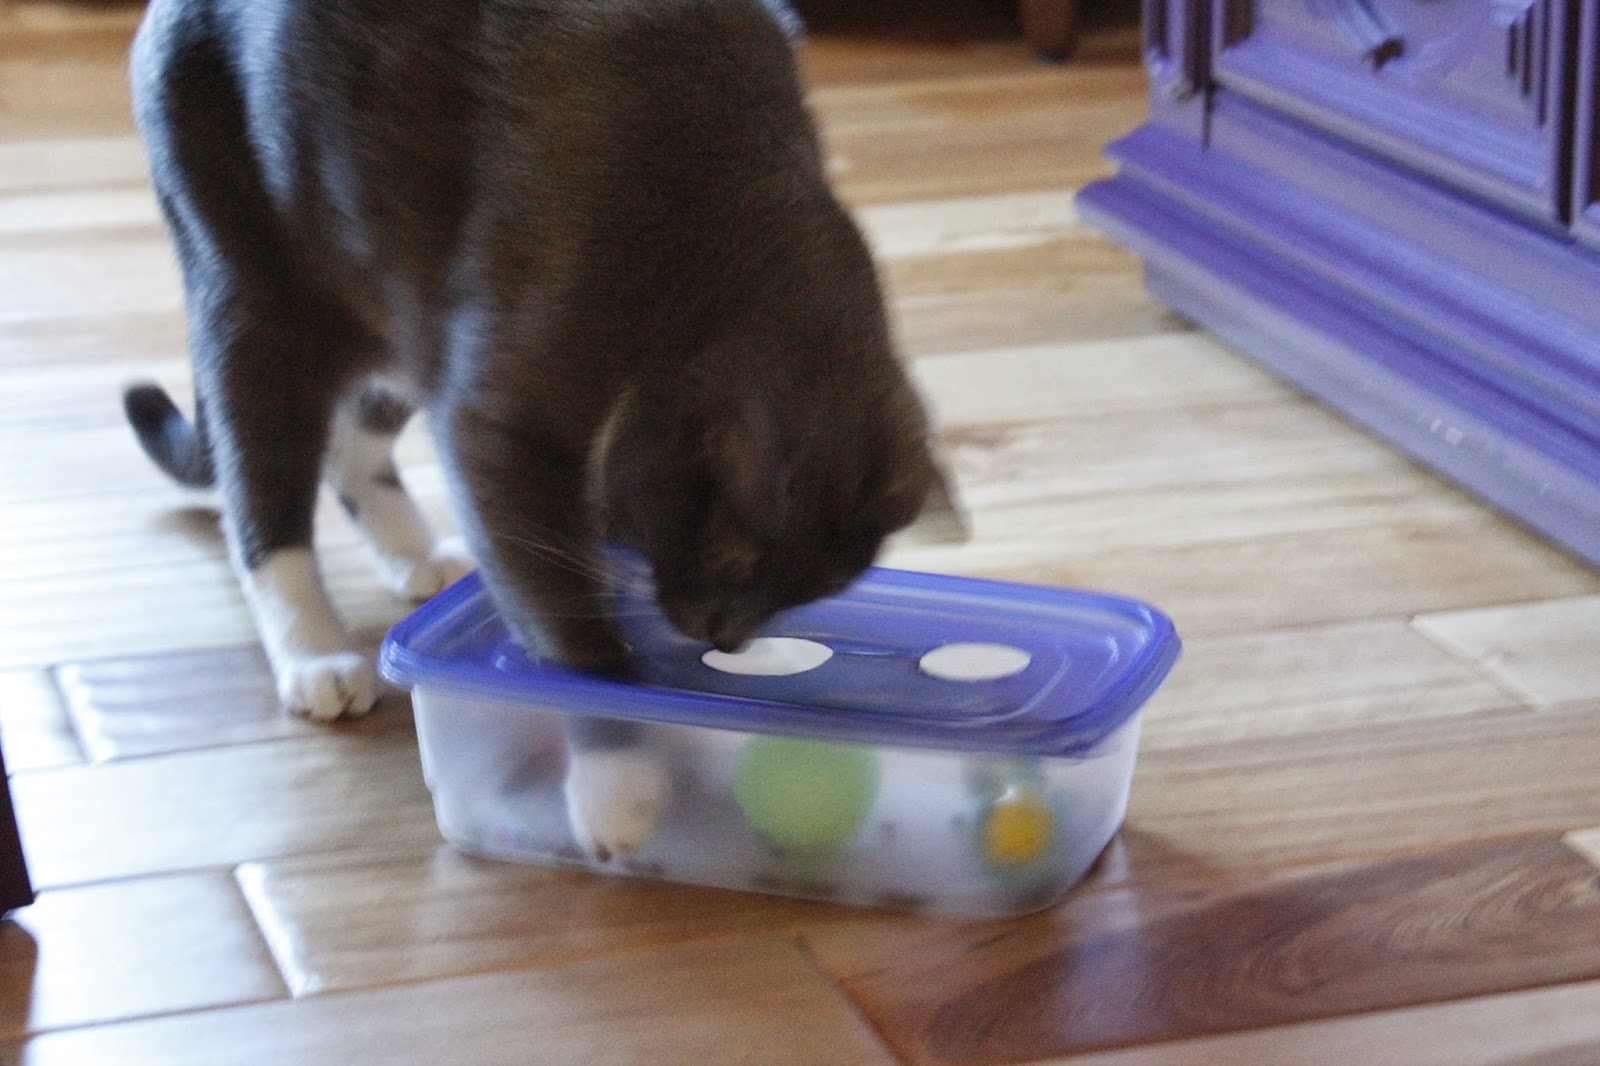
Here is the Quality Control Inspector making sure all is kosher and ready to go!
At this point I added some treats to the toy-mix...

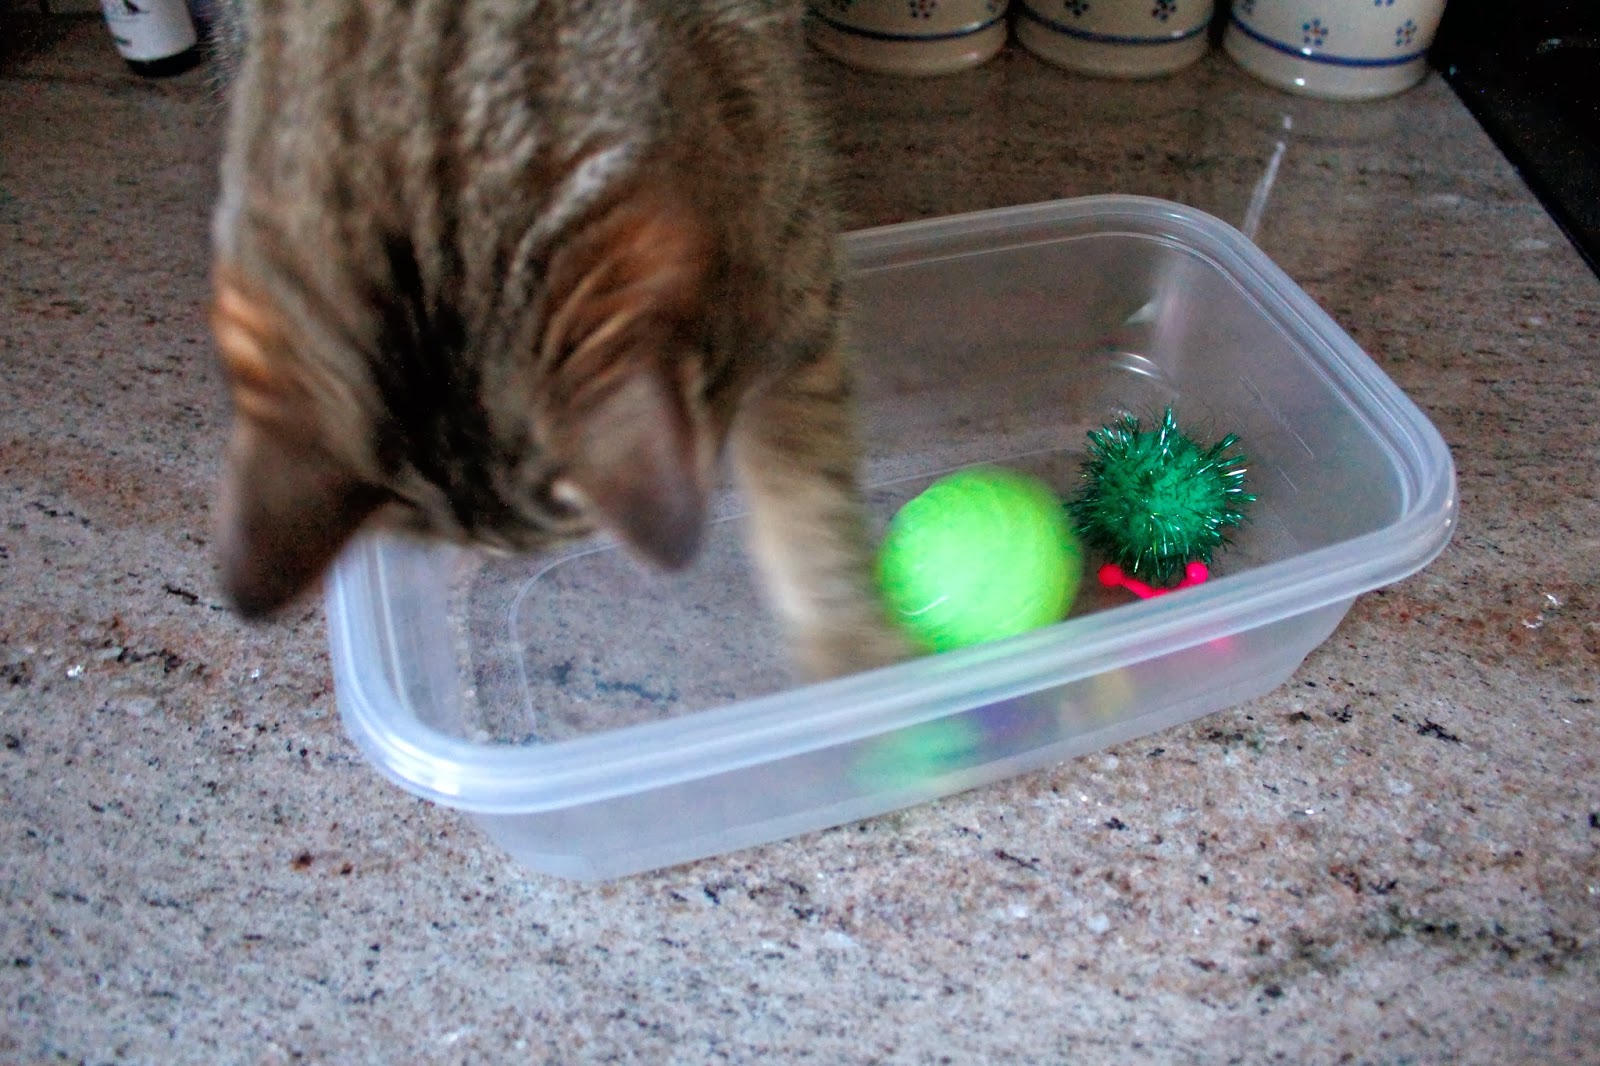
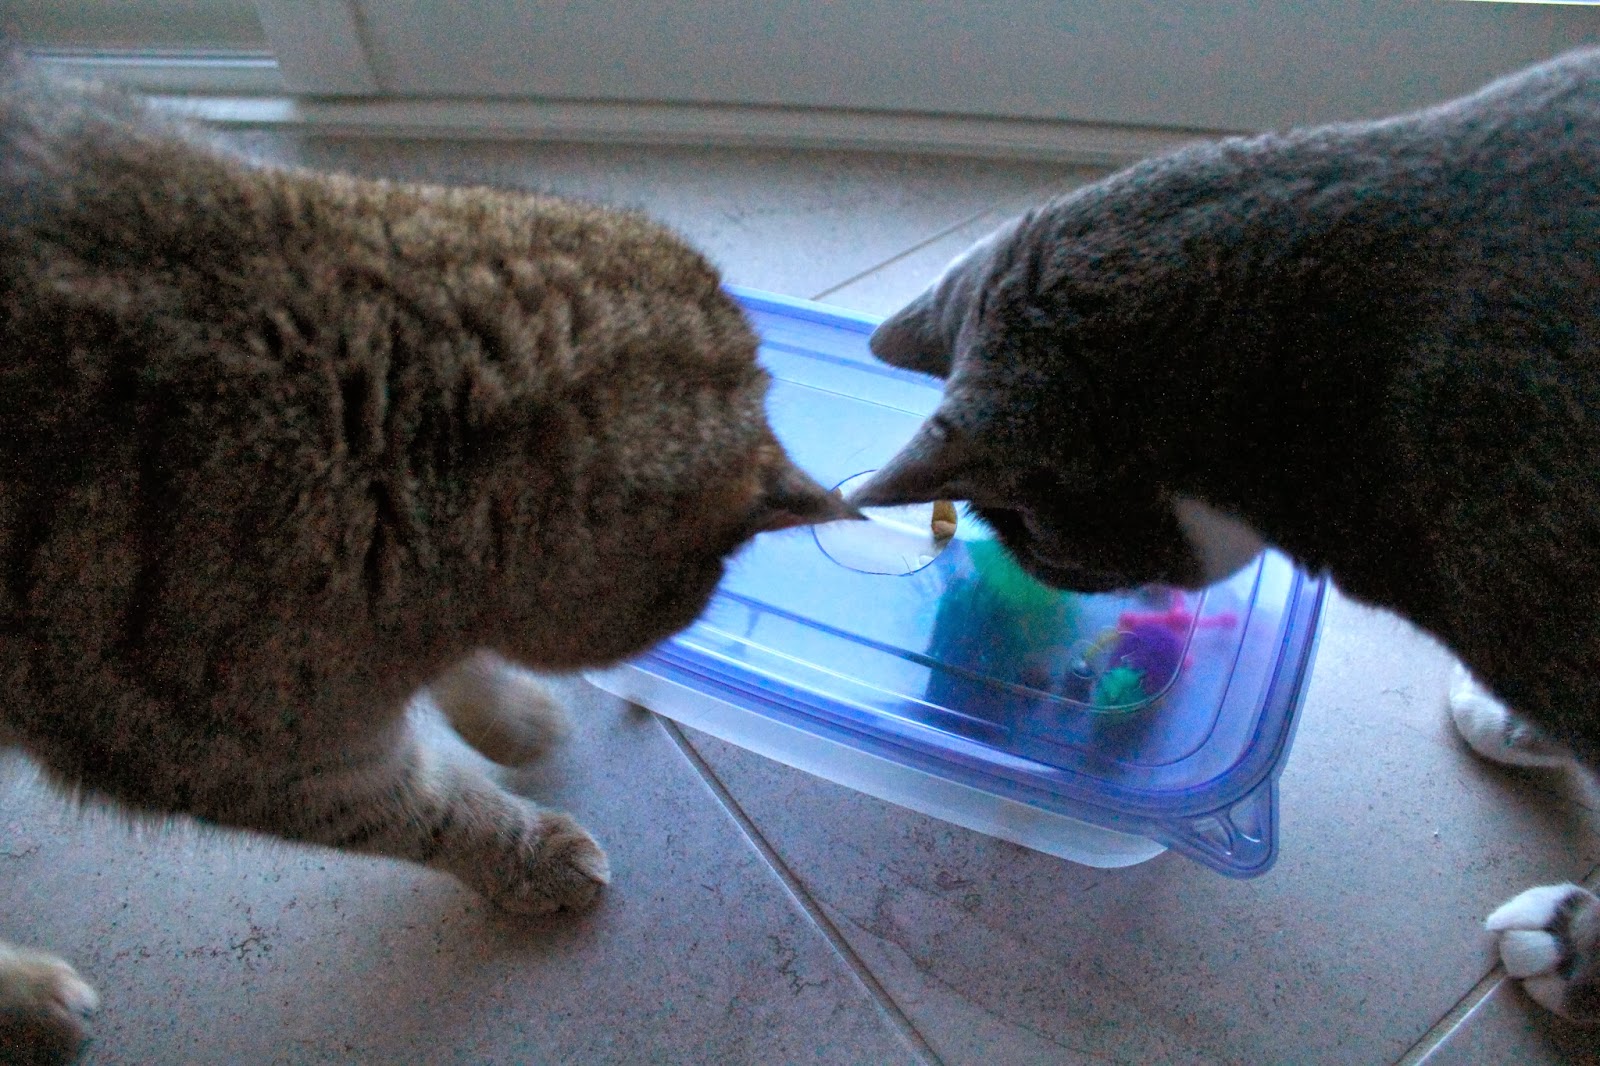
...I put the lid on the container, and watched the cats gather round to inspect it! ^__^
Smokey Bones said: "I can smell it! But where is it? Oh, there! I see it!"

The most rewarding part? I sat down, relaxed, and watched the show! LOL
It may take a while for them to figure it out, but that's part of the point! These type of puzzles, feed into their primordial hunting instinct. They also get a great deal of satisfaction when they do get a treat out, it's hilarious to watch when Smokey succeeds! LOL.

I added a corner opening that same day. I quickly realized that the 3 circles alone, may be too challenging for beginners. I wanted them to be challenged, but not frustrated because they could not 'catch' any prey at all. I feared that if they got frustrated, they would abandon the idea altogether.

I also immediately made a second puzzle box, to ensure that one cat is not hogging it...leaving the other one to merely watch from a distance. I have since used regular kibble in the box so I can use more than a few pieces and they can play longer (treats are very caloric and I try to only feed 2-3 a day per cat).
This is an easy project for anyone, and a very interactive toy that will help to keep the cats entertained while I am gone. It can also be a very effective tool for feeding fast eaters, or for overweight kittycats. It's just so versatile and so easy to make. I can't think of a reason why ANYONE should not make one...or many for their fur babies!
I hope you and your feline companion enjoyed this tutorial! Team Cat Mojo!
Great idea. Off to create one for the guys.
ReplyDeleteThey'll love it Jake! :)
Deletegreat ideal gonna this for my piney-boy he gets so bored thank you
DeleteSame here lol
DeleteThank you btw
DeleteThis is a great idea! Thanks for sharing how you made it :)
ReplyDeleteNo problems StarSpry. I had fun and it was easy, quick and cheap!
Deletegreat idea thank you! i dont have a torch - any ideas on how i can soften those edges?
ReplyDeleteYou could take pumice stone, sandpaper or maybe even a foam nail file and smooth the edges.
DeleteVery true Jen. As Teri said you can use any abrasive aid that you have around the house. The important thing is that you smooth it out enough so that they don't get hurt. The plastic on the lid is thin, but cutting with scissors made a lot of small ridges that were sharp. I wanted to make sure I made them safe!
DeleteA regular lighter worked as well, when I made the second box :)
Great toy keeping my cat occupied after his sister passed thank you
DeleteThis is fabulous. Won't work for my 18ish year old boy. He pretty much sleeps all the time. But I'm pinning this so that if I get new kitties who are playful I can make it for them. Sure beats paying the big bucks for a commercial one. I have plenty of old toys that my boy doesn't play with that I can use. Thanks for the creative and low cost idea!
ReplyDeleteMary, is your boy not food driven? Does he not come when you shake the treat bag? I believe that it would not be too exhausting, even for an OLD fluffer-nut ;) Maybe you can give it a try, making larger holes on the lid? Or only the corner holes (easier)? I would give it a go anyhow. What have you got to loose? Your old fellow may yet surprise you! LOL
DeleteWhat a creative and great idea! You must have been a cat in another lifetime, 'cause you sure know how they think and what they love!
ReplyDeleteYou made me smile a little strongheartwoman :)
DeleteI guess that maybe I was a cat in other life. I am quite obsessed with them in this life ;)
Thanks for reading the blog!
This is wonderful.. I gotta try it!! Thanks for the terrific ideas.
ReplyDeleteGlad you enjoyed it Angel Pets :)
DeleteWow Amazing!
ReplyDeleteThank you for idea!
sorry for my owful english but i'm italian! :D
Thanks Again!
Ciao Sarah, guarda caso lo sono anche io ;))
DeleteQuindi se per caso hai qualche domanda non farti problemi e chiedi pure.
Il tuo inglese e' perfetto, hai sbagliato solo una letterina aweful si scrive con la A, non con la O. Per il resto e' tutto giustissimo :))))
ciao Susi! Facciamo diventare questo thread di commenti una piccolissima Little Italy ;)
DeleteHo trovato il post via Pinterest e sono felice di aver scoperto, insieme, un blog interessantissimo e diverso dal solito. Congrats! Tornerò a leggerti con più calma appena ho un minuto libero. Qui abitiamo con tre tigrotti e, in loro onore, abbiamo chiamato Vibrisse il minuscolo b&b che abbiamo ricavato dalla stanza per gli ospiti :) A presto e grazie per le fantastiche idee!
Caspiterina!!! Non mi e’ mai arrivata la notifica del commento O_o
DeletePurtroppo non ho piu’ cosi’ tanto tempo per il blog ultimamente. Ma chissa’ che un giorno non riesca a postare ancora :)
Bellissimoooooo. Hai un B&B dove? Molto originale Vibrisse per un alloggio! Ai laik it!
I made one of these for me Leelo. She's have a ball with it!!
ReplyDeleteAm glad you did! Your Leelo will enjoy this for days to come :))
DeleteThanks! So simple and yet so brilliant!
ReplyDeleteI've just made one half an hour ago and both cats were really taken with it.
Also I think it will be convenient to store small toys in it (mice, balls etc.) when not in use.
Yes, Diana I do put toys in the box...both to provide for extra texture/sounds, but also to get them some off the floor. LOL. My girl seems to have just as much fun getting all the toys OUT of the box, as she does hunting treats ;)
DeleteLOVE this! Gonna make one (or more) for our crowd! :-)
ReplyDeletePlease do Penelope! They will sure enjoy it. :)
DeleteThis is a great idea, thanks for posting it!
ReplyDeleteBurning plastic is--well, it's carcinogenic, so at least melt edges smooth outside! Or file smooth and/or tape over edges.
Yes, I am glad you brought it up. I burned it OUTSIDE!
Delete...but my best solution was to get a sharper scissor set. For my second box, I got a brand new manicure scissor and that did not need any smoothing ;)
LOL. That's a pickle there! LOL
ReplyDeleteI think smaller holes would work. I need to make 2 more boxes with smaller holes as well. By now it's gotten too easy to get the treats out!
...but my lids are super tight. Did you buy the Ziplock containers? That's what I used...
My cats stuck their heads through the holes right away and got scared! I think I made the holes too big and thank goodness I did not tape the lid shut first! I think it's a good idea to let people know to watch their kitties playing with it the very first time!
ReplyDeleteAs you can see Dot, the holes in my puzzle box are just a little bit bigger than a paw. I would never have made holes big enough for a cats' head to fit through...that would defeat the purpose. LOL.
DeleteAlso with ANY new toy/interactive item you should be monitoring your pets...safety first! :))
If you don't want to use the rubber feet, just put globs of hot glue and let them dry instead. Thanks for the great idea!
ReplyDeleteOhhhhh, great idea Pat! Thanks! :)
Deletehow does your cat get these treats out?? I made this for my cat but all she can do is put her paws in and bat the treats around and get frustrated. I even made the corner hole like you showed. I have fingers and had a hard time trying to reach in and get the treats out so I don't know how she is going to do it ???
ReplyDeleteHow big/small are your openings? How food driven is your cat? Those are the two questions to ask :) I have one EXTREMELY motivated cat (who is uhhhmmm, not smart LOL) who got this in 2 days. He puts his little paw in, and sometimes just take it out to lick the 'dust', but most often he does what we would do he just makes a fist around the treat and fishes it out. ^__^
DeleteMy other cat is NOT food driven. However, she is super smart. She also got it in a few days, but not 2. Maybe like 5 or 6 ;)
She does the same.
Don't get frustrated. Make the holes bigger, so that you can access the treats and pinch them out (between index and thumb) and show your cat how it's done. Do this for a few days and she'll get it. The frustration is part of the fun. She MUST be able to get some treats. That's for sure. But not so quickly that she does not need to try hard. The trying is what satisfy their hunting needs.
So keep at it Kel and when the old box becomes too easy (because the holes are too big) make a new one. I am about to do that myself. At the moment Smokey Bones eats ALL treats in less than 5 minutes. LOL
Good luck and let me know if this works out.
This is a cool idea but unfortunately my Viper Kitty will not eat treats or kibble and would get bored quickly with the toys...
ReplyDeleteAstelzer, you are right, if they don't care about treats they would not enjoy this. But do they like other food? You can try with kibble, but also with chicken breast pieces or anything that can be cut in chucks and will not be too messy. You can wash the container daily, but I would not use pate' ;-)
Deleteshe does like meat. I will have to try it out with chicken :) thanks for the suggestion.
DeleteNo problem AStelzer :) I hope it works. As long as it something in 'chunks' it should work. Today I gave them dehydrated liver. They like that LOL.
Deletehello! how can i reach you??? I'm a freelance writer and I'd love to use this post in a feature for a popular website I'm writing for - can you contact me at tamar@ihavecat.com thank you!
ReplyDeleteSorry for the late reply, Blogger sometimes does not notify me of comments -__-
DeleteI can be reached at motterlesusi at gmail dot com
im making one right now? is it critical that the lid be a little see-through? cuz mine is not! oops :)
ReplyDeleteWell, I don't think its impossible for them to figure the puzzle out without the vision-aid. Cats have a very keen sense of smell. They may be just as fine with a solid top :) Let me know how it goes.
DeleteHi Hasan, actually I have been really busy with full time college. So I have not updated much. Also this is my personal blog. More of a hobby than a true blog. So I post random projects I do. Some of them involve my kitties, but not all of them. If you subscribe to the blog (FOLLOW BY EMAIL link top right of this page) you will get an email if I post anything. So you won't miss posts. Thanks for reading and for the kind words.
ReplyDeleteI wanted to thank you for this great read!! I definitely enjoying every little bit of it.I have you bookmarked to check out new stuff you post.
ReplyDeletepink butcher paper
Thank you Albert. :)
DeleteThis is great! I made one in literally under 5 mins ad my big lazy boy is already sniffing at it and poking around! Oh...there goes the girl to investigate :)
ReplyDeleteThanks for sharing :)
Yes, very quick to make. :)
DeleteAfter they figure it out they'll have so much fun getting their food this way. It keeps them entertained.
I am glad you found it useful!
I was able to find good info from your content.
ReplyDeletelol ct
I am glad Moorthi :)
DeleteHi Susi! We're compiling some good DIY pet tips and tricks for our magazine at The Humane Society of the United States and would love to use this one. Would you be game for that? (We'd credit your blog, of course!)
ReplyDeleteLet me know -- I'm reachable at callan at hsus.org.
Sorry for the late reply. Blogger did not notify me of your comment -__-
DeletePlease contact me at motterlesusi at gmail dot com before using any of my posts to obtain permission.
easy and affordable toy. thanks for sharing!
ReplyDeleteHi,
ReplyDeleteI'm writing to let you know that I've recently created an article about DIY cat toys.
I loved this idea of yours so much I decided to include it in the article.
Here's my article: http://charliespaw.co.uk/101-diy-cat-toys-that-you-can-make-at-home
It would be great if you could share a link to my article or even link to it from your site too.
Anyway, thanks for your super work.
Cheers,
Andrew @ CharliesPaw
Thank you for linking back to my page Andrew. :)
DeleteI will share your post on my FB page. I have not been very active with the blog lately as life has been quite hectic for me. But I know many crazy cat lady people that will love your article.
I'm thinking of going to Dollar Tree and picking up some supplies to make these, both for home and for the humane society that I volunteer at.
ReplyDeleteIs there any way to get a printable version? That would be easier for me.
A printable version of the design? Materials?
DeleteNo, but either way it's very easy. You just draw some circles on your Tupperware lid and cut with sharp scissors or exacto knife. Then you put some toys inside the box. They don't even need to be store-bought toys. Some of my goodies are rings from milk bottles (the pull off tabs), paper wads, foil balls, etc. :)
The point is just to put items in there that will make it harder for the cats to get to the kibble therefore appealing to their hunting instinct.
Very much so Debbie O. It feeds their hunting instinct as well as slow down food intake. It's very good for cats who tend to eat too quickly.
ReplyDeleteThank you so much for the great tutorial! I never would have thought to burn the sharp edges, I probably would have used tape or something. I read your article, went shopping, came home & made the "balls in the box" toy. My kitten LOVES it! Mine doesn't look nearly as pretty as yours, I think the lid I used was a little too brittle. I plan on making a couple more with different containers. Thanks again. 😎
ReplyDeleteThank you for the kind words Hoteamom :)
DeleteIt does not need to be pretty to impress the furbabies. They appreciate regardless. I hope your cats will have fun playing with it and you can always 'upgrade' whenever you feel like it. ;)
That's the perk of home-made toys. Not much waist of cash.
We just adopted an 8 week old kitten and were looking for sensory stimulation ideas. So glad to have come across your post, absolutely love it and looking forward to making this for my little Bailey. Thank you!
ReplyDeleteI am glad it helped Rajam. I need to step up my game and make new ones with increased difficulty. These are wayyyy easy for Smokey and Rufus by now ;)
DeleteDear Susi, I am feeding my sister's cat while she's out of town. What a terrific idea for him! I think he's probably very bored and this should entertain him nicely. Thank so much!
ReplyDeleteLaura
Oh, wow - I made it and what a success! Patch hasn't gotten any food out, yet, but he's having a great time trying. Thank you so much!
ReplyDelete