Wednesday, January 23, 2013

Waste basket update Tutorial


As I wrote earlier on my 'cat box' post, I have been updating many of my home's fixtures with Rustoleuom rubbed bronze spray paint. Spray painting is a pretty easy task that even the novice crafter can tackle easily.

My latest project on this series is my bathroom waste basket. It's like a miniature trash can, and I truly love it. I am not too fond of open baskets, as you can see the waste inside. And who likes to gaze at trash? This basket has a nice lid that conceals the waste and a pedal for easy opening if your hands are full. So what's the problem here? Well, the finish. In my old home everything was brushed nickel, here most of the house was already rubbed bronze when we moved in...and we are slowly transitioning whatever wasn't. I'd hate to have to buy a new trash can, when I have a perfectly good one on my hands. So, out comes my can of spray paint and a new project begins.

* * * * *


Here is my trash can all taped up and ready to be sprayed (I used masking tape to cover all parts I did not want to get bronzed). I removed the lid as it made it easier for me to spray the two separate parts. I have yet to spray the small rack that you see in the picture. I have not yet decided if I will spray it or not (my basement bath is chrome...so I may use it down there as is).


Since I did not want to worry about spraying the inside I filled the bin with a paper wad and only taped a few inches for safe measure.


I went on to spray several thin coats, first on the bin itself and then on the underside of the lid. I sprayed several thin coats until every 30 minutes until I was satisfied with the coverage. A few hours later, I flipped the lid right side up and sprayed the top. I did the same with the bin (flipped it upside down) to make sure I would get all angles. Again, I sprayed thin coats every 30 minuter or so, until I was happy with the results. And here is my finished product. I think it looks pretty good. Off course it does not have the Venetian bronze finish with the copper undertones, but it looks better this way when the rest of the room is accessorized in a bronze finish.


And a profile ^__^


Be honest. You LOVE the yellow formica countertops don't you? LOL. Don't despair. The granite has been ordered and should be here soon. I can't wait!

* * * * *


 Most other 'bronzing' projects are PB (pre-blog), so I don't have many pictures of the step-by-step. But, I thought you may enjoy seeing how they turned out, so here are a few.
I sprayed all of my air vents...this one is in my kitchen. I really love my new tiles.


My laundry's fan. The colors are a bit off since this is a windowless bathroom. 
Virtually no light in here.


And finally, my guest bathroom bathtub's plumbing (the handheld shower has not been spray painted. It is actually a true Venetian bronze finish and so is the shower rod. This should give you an idea of what the spray paint looks next to the real deal).


Here is a close up of the faucet.


I had actually thought of replacing the tub's faucet handle with a newer style one, but then a friend of mine (who did) advised me against it. Apparently her new handle does not seem to successfully mix the water temperature as this old one did. Her water is always either too hot or too cold, so I may just have to live with this handle after all -__-

There is really no limit to what you can spray paint. I have seen other bloggers spray paint shower enclosures, door handles, cabinet hardware, light  fixtures, ect...your imagination is the limit. Spray paint is a quick and easy way to update your home on a budget! 


Thursday, January 17, 2013

A baseboards' story: from sad to awesome!


When we first saw our home we knew that there were many things we would have to do to bring it into the 21st century. One of my most favorite updates to the house, so far, has been our baseboards. My DH came up with this idea all by himself! I am so proud to have a hubby that is super handy like that!

Our home, like many others, was equipped with thin, brown, base moulding - in poor shape, I might add. Part of the charm of a house is given by its architectural features. Moulding being one of the least obvious, yet very important of those features. So how could we give our home more depth of carachter? Off course we could have gone to a large home improvement center and purchased new trims...but that would have been very costly for an entire house! Being on a budget, big bucks were not in the picture. And this is when DH came up with the awesome idea to just literally add a 'base' to our existing moulding. It was a stroke of genius! I just couldn't believe how simple of an idea that was, yet how truly marvelous. I wondered why I did not think about it myself, the queen of thrift! LOL.

Off we went to the home improvement store looking for some trim that would meet our requirements. It needed to be super simple and to be the correct size. We found something that would work at Lowes. The strips were not super nice, DH spent several minutes picking out the straighter ones...and it was no easy task. But with $100 we had enough to modify all of our home's baseboards.

Then came the labour-intensive tedious task of removing the boards carefully, gluing all the trim to the original baseboards, nail it in place using a nailgun, and giving it two coats of primer and two coats of paint. * Insert official thanks here to my sister Y for helping me with some of the painting. *

I did not take enought photos for this to be a true step-by-step tutorial, but I did take a few shots of the 'before' and of the 'after'. So I hope you can get the jist of how this went down, to help you create your own super thick moulding. It is incredible what a difference thick, crisp, white moulding makes to the entire look of a home! 

This is what we started with. Thin, brown baseboards that had been stained a dark mahogany color.


This is a shot that shows the before, during and after. The top moulding is the original one, the middle is the baseboard with attached to it the strip of trim (just simple pine), the bottom one has already been primed twice and painted twice as well.


Here is a close up of what they look like. I still need to do paint touch ups on both the baseboards (to cover up the nail filling) and to the walls (to cover up the caulk) but they already look sooooo much better! Don't you think?


This is a cross section of the moulding. As you can see the added trim is lined up on the back of the baseboard to keep it flat against the wall, we left the excess in the front to make another interesting groove that blends with the rest of the trim once painted. DH spent countless hours caulking around top and bottom of ALL those baseboards. This ensures both energy efficiency but also, it keeps the bugs out! A big hurray for smart ideas and hard labour!


It's amazing how, once primed and painted, it is almost impossible to tell that there ever was any addition! It looks just as good as a thick baseboard you can get at the store. Off course they are not perfect, they still retain dings from wear and the little nail holes...but once they are installed, and surrounded by other pretty things, they look so good it's hard to even notice these small flaws. This is a shot of the hallway the day we closed on the house.


This is a shot of the same hallway after the refinished baseboards, doors and trims (and new floors and painted wall...off course!).


I know it may seem trivial for most, but trim size & color makes a whole lot of difference in the look and feel of a home! I just can't believe what a difference it made! :)


Tuesday, January 15, 2013

Cat Chest Refinishing Tutorial


All right, I am a cat addict! So much we know.
But I am also a glam addict!
So what has a girl to do if, she has no space for a second litter box in a hidden corner of her home? Well, she has to come up with a solution to hide a litter box in a very conspicuous spot! 

Enters 'the cat chest update'. 

I have been wanting to hack a blanket chest (entry opening, air vents, and dividers) for a while now, but my DH was gone (and I suck with power tools) so, when I came across this chest on CL for $40 I was hooked, line and sinker! I HAD TO HAVE IT! These are the photos from the CL posting, hence the small size. Sorry, in the excitement I forgot to take any 'before' shots.


Just in case you guys want this but, don't want to bother with the refinishing, you can find the same box at http://www.lovethatcat.com/cat-furniture-chest.html these guys offer a small degree of customization too. (Again, I received no compensation from these guys, I am adding this info for your benefit only).

Back to the chest. So it was 'sorta' clean...um, not really! LOL. But, most items bought off of CL aren't. Anyhow. I removed dust, dirt, grime and um, yes, cat poo with a detergent-bleach-water solution. I let it dry really well and then I took it apart (lid and dividers) and lightly sanded the whole thing down. I knew I was going to spray paint the inside (I was worried that 2 coats of primer + 2 coats of paint would make the dividers hard to slide back in if, I had rolled or brushed. I was right! It was barely ok with über thin coats of spray paint!) so I used a primer in spray form as well. This is the brand I always use, for all my projects with either oil based or latex paints. You can either roll it, brush it or in this case get the spray can.
image courtesy of thepaintstore.com
I don't have any pictures of when I primed the inside, but basically I spray painted the primer only on the inside of the chest twice and waited for it to dry 24 hrs in between coats. In the mean time, I spray painted my brass hardware with Rustoleum rubbed bronze spray paint (I have a love/hate relationship with this guy). I always poke my screws through the cardboard to make them stand up. 


Ummm, yes once again, I was too excited to remember to take a picture of the hardware painted. But, hey! I did not forget to share the HATE part of the relationship I was hinting at before with Rustoleum! I love the finish of this paint, however, I HATE the way it sprays...and this is why!


So far, I have used several cans of this paint for various projects, and it's always behaved this way. I may do a summary blog of all those projects, one of these days. I am not sure why this paint drips the way it does, but it does and it drives me nuts...but I do like the finish...so it's a catch 22!
Back to my chest. I decided to try out a paint I have been wanting to use for a while now: Krylon. I have seen many bloggers use it successfully, and I like that it comes in a great array of colors. I needed purple and I liked their Rich Plum shade, so I bought some at Walmart.

Photo courtesy of Walmart.com
As you may have figured out by now, nothing with me is perfect! :)
 When I went to spray the first coat of paint, something was very off. The can was dripping all over the place, a MESS! It was only the following day (when I was ready for coat #2) that I realized what had gone amiss. I had removed the red 'thingamajig' that was on the nozzle (now, now, are you wondering if thingamajig is a real word? Off course it is, just ask my Texan in-laws. LOL). 
WHY in God's green earth would I remove it, may you ask? Well, the afore mentioned Rustoleum, comes with a safety that HAS to be removed. Guess what? That safety is a small red thingamabobber! Do you see now where this is going? I am so used to think: small red plastic thingy = trash, that I just did that without reading the instructions on the can. ALWAYS READ INSTRUCTIONS! Said thingy, was a very handy-dandy nozzle orienter. No wonder I was dripping all over! I removed my sprayer! Silly me! Well, I guess I learned my lesson! I sprayed a total of 3 coats of purple with 24 hrs drying periods in between. Next I rolled on 2 coats of Zinser cover stain primer on the outside of my chest - always use good quality tools...in this case a good nap 4" roller. I prefer to roll regular paint and primer whenever I can, as you get a thicker more durable coat. Spray paint is most useful if your piece has tons of carving, nooks and crannies, if you want a perfect airbrushed finish (like for the rubbed bronze hardware) or if you want a super thin coat. 
Here is my chest painted inside and primed on the outside.


Then I rolled on 2 coats of white paint (I first cut in all the nooks and crevices with a 2" Purdy paintbrush). I had a leftover can of Rustoleum Oil base Gloss paint from other projects, so I used it

Photo Courtesy of Shopping.Yahoo.com

Here is the finished chest with 2 coats of primer + 2 coats of white paint... 


The same exact treatment was given to the lid, 2 coats of primer + 2 coats of paint. 
The great thing about oil based paint, is that you don't need a clear top coat. It cures very hard and it dries like an enamel. 


I knew I wanted to stencil a design on the front panel in purple. So again, what has a gal to do when she does not want to pay $40+ for a nice stencil? Well, she tries to improvise. I had read bloggers having successes etching glass with a stencil made from contact paper, so I thought I'd give it a try for my project. I hand drew a mirrored image of my design on the back of the paper, and then I carefully cut around my shapes using both regular and manicure scissors. 


I very carefully adhered the contact paper to the front of my chest and used painter's tape to cover all the edges around the stencil. I wanted the design on the outside of the chest to match the purple hue on the inside so, I had to spray paint my design. Since spray paint is messy, and the overspray travels everywhere, I made sure I completely wrapped my chest with a plastic drop cloth and taped it in place.


I sprayed 3 thin coats of purple Krylon.


As I mentioned before, this was just a trial. I knew, going in, that the makeshift stencil may not hold...and in fact it didn't. When I removed the self adhesive liner this is what I ended up with.


Well, I guess it was worth a try! At this point, I was pretty happy with the design, just not happy with the poor quality and jagged edges of the stencil. So I grabbed a tiny painter's brush and I proceeded to hand paint around the entire edge of the design to clean it up. The result is not perfect, but I am still pretty happy with the chest as a whole. 


Here are a few shots of the chest in my master bedroom, yes that is Mrs. Rufus inspecting the quality of my work!


This shows you the guts of the chest. As you can see I keep Clorox wipes, scooper and bags on the left compartment, the litter box is in the middle one and i slid a mat under the 3rd divider to help control tracking (somewhat).


Here Rufus demonstrate how they enter and exit the chest. She is quite the visual aid :)


Hope this gives you some inspiration on creating your own furniture hack to hide the unsightly yet very much necessary array of litter boxes in your homes! 


= ^. .^ =


Friday, January 11, 2013

Organic chicken Bouillon Tutorial


Living in the land of hydrogenated oils, high fructose corn syrup and GMO's, I have learned to make a whole lot more homemade stuff than I ever did when I lived in Europe. I have been making my own bullion for a while now, and I gave some to one of my friends around thanksgiving. Since then, she has been asking me to show her how to make it, so this morning we all gathered in E's kitchen and made some chicken bouillon. I will try to give you a quick breakdown of the recipe, but remember that I am Italian and that we do use the metric system. If you need a converter, just do a quick google search and you can switch my grams into either cups, oz or whatever you find yourself more comfortable with. Also keep in mind that the following recipe is what I use when I make my own. E did not want that much so we halved the recipe (hence the small jars you see in the last photo). When I make it with the following recipe I end up with nearly 2 quart-size mason jars full of bouillon. For me that's ok, cause I use this thing in nearly everything I made (and I gift some too) but you may want to start with half that amount and just keep an eye out on the ingredient's ratio.

Ingredients:

800 gr organic chicken (I use deboned thighs or drums WITH skin...I know skin is gross, but we are trying to go for flavor here...if you use chicken breasts your bouillon will taste like, um.... chicken water! LOL)
200 gr carrots peeled
200 gr zucchini squash
100 gr onion peeled (red or white, whatever is your preference)
100 gr leak (make sure you wash this really well as it is a sandy bugger. If you don't know how to clean a leak just look it up on youtube. Plenty of videos for you to peruse.)
100 gr celery stalks (you can use the leaves too)
1-2 garlic cloves (peeled)
10 leaves of fresh sage
1 sprig of fresh rosemary (stem removed)
1/4 of a cup of white wine (you can substitute with tomato paste melted in water, or just water)
500 gr salt (coarse sea salt would be preferable, but regular salt will do too.)
2 bay leaves
If you have a chunk of REAL parmesan cheese (ie. Grana Padano or Parmigiano Reggiano) you can carefully cut off the crust, scrape it with a knife to clean it, and add it to the vegetables.

So here we go, I like to begin with all my 'mise en place' (the fancy French way to say: line up all your ingredients first!). Whenever I can't find deboned meat, I debone it myself.  E was on top of things and had it deboned for me already (I love those efficient I-talians! ^__^ ) so, all I had to do was cut it in bite size chunks. Then came the veggies. I always take care of my leak first. He is the fussy type. I sliced off the roots and cut it crosswise on the white stalk, and then I washed, washed, washed. When no more sand was visible, I trimmed just a bit off the top of the green leaves and chopped and used ALL the rest (I hate waisting food and, the green part is just as good for you as the white part!). Then I chopped all the rest of the vegetables up into bite size chunks. 


I didn't take a picture of the chicken chunks as they looked like, um....skin-on chicken chunks. LOL. You'll get a chance to see them later during assembly. I weighed everything on my digital scale to make sure I got all my ratios right. The percentages are: 1 part chicken, 1 part veggies and 1 part salt. Easy peasy! Now that I had all my stuff ready, it was time to start assembling. A non stick pan is what I prefer to use teflon, but E's looked more like an enamel pot, and it worked just as fine! I assembled all my ingredients COLD. It's hard to see from the photo but, there is a layer of salt on the bottom of the pot. Too bad it's white on white. LOL. But it's there, trust me. 


After that, I layered in my chicken chunks. See? They look just like skin-on chicken chunks. LOL


One more layer with the veggies, the herbs (rosemary, sage and bay leaf) and the wine.


Ok, now it was time to start cooking. I put a lid on the pot and turned the stove on LOW


 A few minutes later (maybe 10-15) I checked for the cooking juices to appear. You may see them here. The salt was doing its job and releasing the water contained in both meat and veggies. Good, that was my clue that I could now turn the heat up to medium and wait for it to simmer.


A few minutes later my pot was simmering to a boil. At this point I stirred all the ingredients well and then returned the heat to medium low (#2 on E's stove). I made sure, every now and then, that the mixture kept a slow boil. You need to keep it bubbling slightly the entire time.


About 1 and a 1/2 hours later this is what my "pot o' goodies" looked like! Lots of juice and all the salt melted. Almost done. Hang on tight.


I removed the 2 bay leaves and then, the entire content of the pot made it's way into the food processor where I pulsed the mixture into a cream (do not attempt to use a smoothies blender, it will not work. An immersion blender however works just fine).


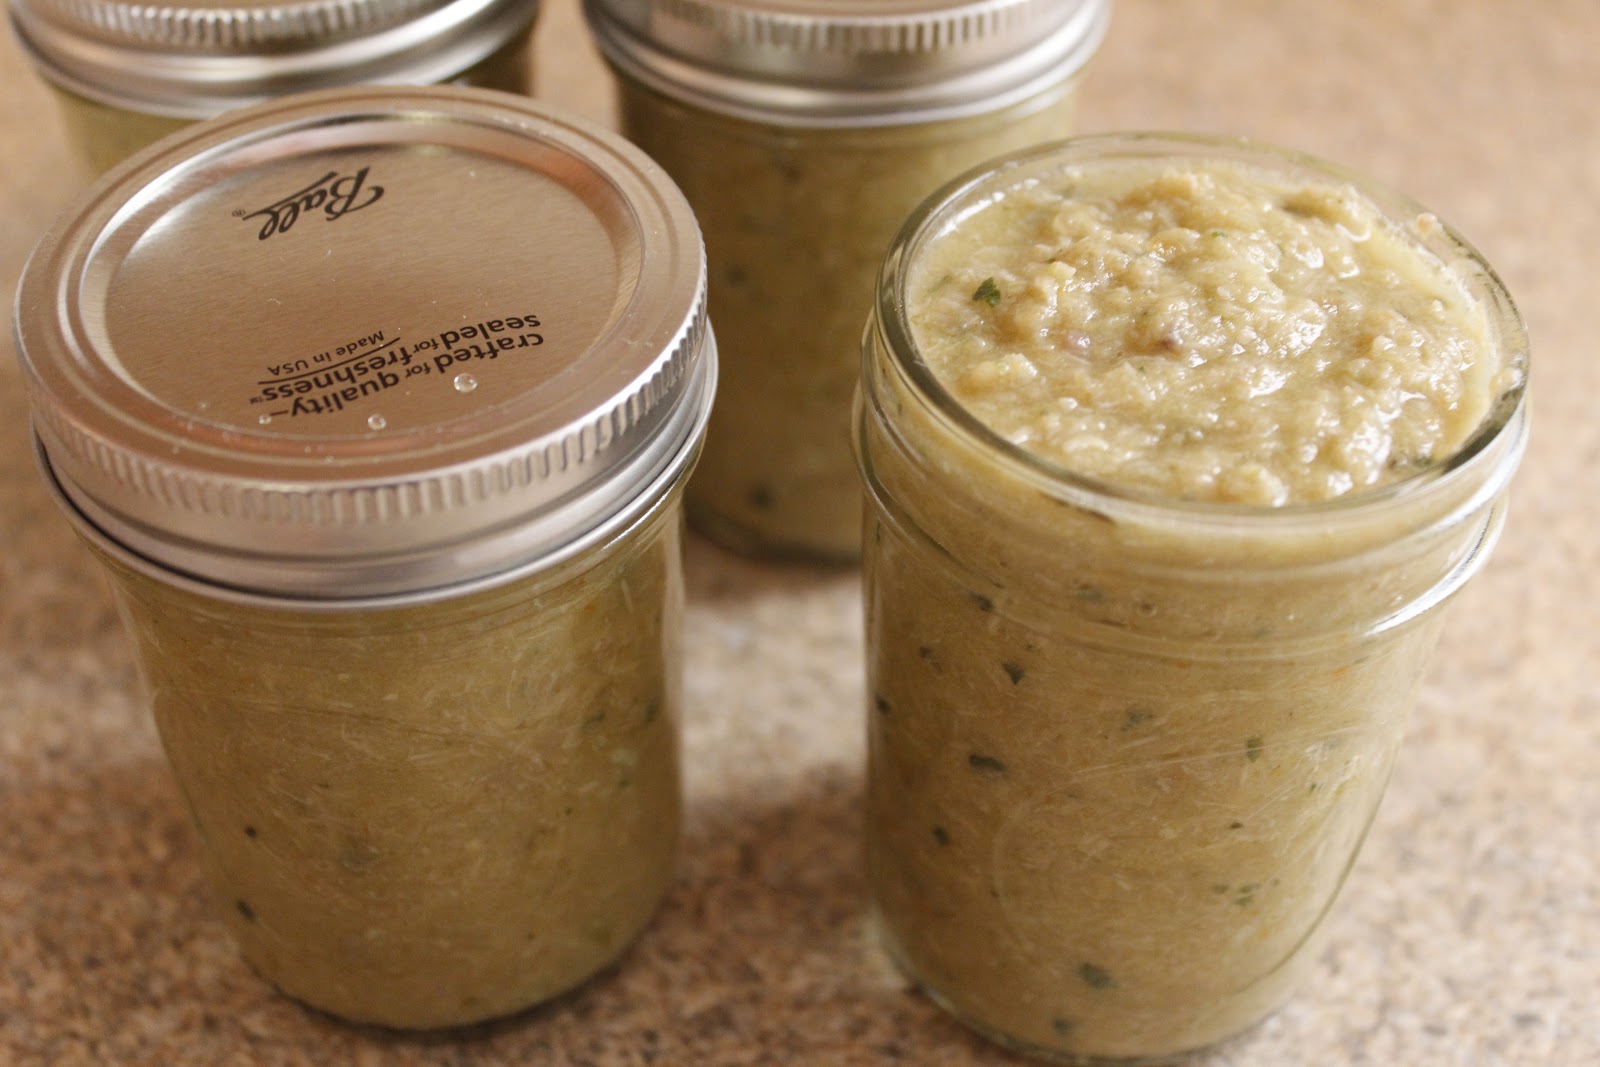
And this was the result of our labour of love. The halved recipe yielded 4 half pint jars and a little. At this point we were done. The bouillon keeps either in the freezer (won't solidify) or fridge for months. The high salt content does not allow for bacteria to grow. So it's safe to keep for a long time. If one would prefer to have a granulate, dry bouillon, it would be as easy as getting out a cookie sheet, lining it with parchment paper and spreading the pureed mixture flat and thin over it. Then insert it in a warm oven, and wait for the puree to become a solid crust. The crust can then be broken, when cooled, and re-blended once again to obtain a powder. The bouillon can then be stored in your spice cabinet.

* * * * *

A teaspoon of this homemade goodness equals about one "cube" of industrial bouillon. Beef meat can be substituted for the chicken meat, and off course meat can be left out all together to make a vegetarian version. 

Well? Are you wondering where the mistake is this time? LOL. I can tell you where it is...it's on the assembly part. Every other time I make this, my layers are salt, veggie, meat. Do you see where I am going now? Yes, I inverted the last two layers...and guess what? It was just fine. So see? Nothing is ever perfect and even if you make a small mistake it's no biggie. Chances are the final result will still be great! Now go out there, and have fun! :)


Wednesday, January 9, 2013

Whole-house Humidifier Updo Tutorial


So here I am in Colorado, where the humidity level is so low, my skin has already started to mummify. So what has a gal to do, to avoid turning into Tutankhamun, may you ask? Easy. Ask Craigslist and you shall receive! * Insert butt-ugly-whole-house-humidifier here. *

I have been wanting one of these for a while now. I first saw this exact model when I came to visit one of my friends, here in Colorado, a few years back. I remember her filling it and spending time on its maintenance (which I am in no way looking forward to), but I also remember breathing easier inside her home than outside! So off I went, scouring CL for a decent priced unit to bring home. I found this one for $40. Hold on, hold on, before you jump the gun and think it's a steal, I have to inform you that it was absolutely and utterly nasty when I picked it up! I had not anticipated it coming from a SMOKING household...and it was too late to turn back by the time my nose gave me the hint (I had driven across town, and that was the only unit like this on CL). So, I took the foul beast home and proceeded to spend the following 4 hours, yes you read that right 4 hours, detailing this sucker from the inside out. Let me tell you that smoke, but in particular tar, and humidity do not get along in a dusty environment! The dust had mixed with the tar and turned into a gooe-gluey mess! There was a lot of toothbrush scouring action on all the nooks and crannies, especially in and around the fans. Can you say yuck? I guess that, if it wasn't for the fact that this model retails from Sears at close to $200, I would have been livid. Oh, who am I kidding? I WAS LIVID. But I didn't really have anyone to blame but myself. I should have known better, and asked if the item was from a smoke free home. I guess it's a lesson learned!

Anyhow, back to the humidifier. I knew, from the moment I saw the listing, that I would have to update this guy. He looked so sad with its fake woodgrain paneling look. I felt like I HAD to give him a new style. The upside to this piece was: hard plastic construction and flat panels. That makes a perfect surface for contact paper! So off I went looking for a nice, graphic, modern-print, self-adhering shelf liner. I happened to snag this 2 pack for $5.99 at one of my favorite stores: Marshalls! I know what you are thinking: "I will never find the same one now, discount stores only have one of a kind items"! Do not despair my peeps, this particular company has a website:

themacbethcollection.com 

They sell tons of stuff, including contact paper in awesome, colorful prints. So stop the whining, and go get yourself some cool, modern liner to start your own projects with! (and no, I did not receive any compensation to name this company. I am only writing this down for your benefit).

This project took about 1 hour total to complete. Although, I have to admit, I am quite experienced at using self adhesive liner from many projects I tackled during the years (an entire fridge, kitchen tiles, a steamer trunk, a backsplash for my first ghetto apartment and much more). I love contact paper because it's so easy to use, it's fairly simple to apply, it offers a drastic change to whatever you use it on, but most of all IT'S CHEAP! So here is the quick breakdown of this project:

I started with my ordinary ugly humidifier unit.


I gathered my supplies: a pencil, a ruler (I had my level handy so I used it instead), a pair of scissors, my adhesive shelf liner and an exacto knife. Yes, those are Mrs. Rufus' fuzzy boots you spot on the top right! She is always around helping me out when I start tackling a new piece ^__^


My next step was to measure the front panel for size, and trace my outline on the back of the paper. The graphs on the back are there to help you. Use them to your advantage. Make sure you cut a little more than you will actually need. The paper never really sticks EXACTLY the way you want it (you will see what I mean at the end of this post), so if you have a millimeter or two extra you can trim it down to size, rather than ending up short.


The next step is to stick your paper on your subject. In this case my ugly 'humidor'. I always start from the top left corner, and work my way down to the bottom left corner. Once you have an entire side stuck down where you want it, it seems easier to keep things straight. Make sure you gently smooth your paper down as you go. If you pay attention and work slowly you should be able to get the paper to stick without trapping any air bubbles. I do all of the above just using my hands and fingers, but you may find useful to use a smooth flat object, like a credit card. The backing of the shelf paper always has instructions as well. So you can rely on those for guidance. If you do end up getting some air bubbles, try to unstick  your paper and to smooth it back down again paying more attention this time. If those stubborn little suckers are still there you can carefully poke them with a needle and push the air out. Here is my front panel midway through.


Once you are finished adhering the paper to your surface, trim any excess with the exacto knife. Try to cut in one continuos motion, to avoid snags and jagged edges. 


So now that the front panel is done, it's time to concentrate on the top panel. Again, I measured out my needed piece, traced the amount on the reverse of my paper and I made sure I had excess to trim. Since this time I had a lot of excess (due to the rounded shape of the panel) it was harder to keep the panel straight. I used the frame of the humidifier to help me keep the paper lined up. This is a graphic print, so if I had stuck the liner askew it would have been noticeable. 
Again, smooth all of your paper down starting from the top left corner and work your way down first and then to the right. Once you are finished applying the liner, trim the excess.


And tadaa! There you have it. 
My job is done, and I can now enjoy my finished piece.


So, on my first post I said I was here to share my successes but also my failures. So here it comes. Are you ready? Here is my boo-boo on this piece. Because NOTHING in life is perfect...and we better realize it, and start dealing with it, and avoid disappointments of sorts. I tried my best to keep the paper straight but I ended up askew by a millimeter at the bottom right. I may be the only one to notice it, but here it is. 


The reason I let you in, on this 'faux pas', is because I want you to realize that often when you see a project online it only LOOKS perfect, but reality is, we all make mistakes and we all mess up. The important thing when you upcycle, like in life, is to just try not to focus too much on the negative but instead keep your eye on the positive and move on to your next piece. Never think that you don't have it in you. That you could not achieve what another person has. Remember, if you put your mind to it you can do it! Happy upcycling!


Sunday, January 6, 2013

Kitty talk


Ok, so here I am with a bit of kitty-kat info for anyone who may care to hear about improper elimination. Improper elimination is the technical term for a cat who may urinate or defecate outside his/her litter box. For one reason or another, many cat parents find themselves in this very annoying situation, at one point or another, in their cat's life. In my circle of friends, I have somewhat end up being known as the crazy cat lady, the go-to-gal to consult if you have any feline related question. So this topic has come up many a times! I am going to group most of my do's and don'ts here for your benefit :)
  1. THERE IS NO SUCH A THING AS IMPROPER ELIMINATION OUT OF SPITE! Cats do not know such feelings as spite or hatred. They simply react to stressors and problems in their territory to attract your attention (sometimes that's in a stinky manner). They are simply crying out for help and demanding your attention to resolve the issue. Once the issue has been solved, most of the times they revert to be the proper, well mannered cat that you loved and cherished.
  2. ALWAYS MAKE SURE THEY ARE HEALTHY. There are many health conditions that may associate with improper elimination. Urinary tract infections (UTI's), constipation, diabetes and so on. If your cat starts thinking outside of the box, take him/her to the vet and make sure there is nothing medically wrong.
  3. LITTER SIZE MATTERS. I often cringe when I see what size boxes cats are forced to use on a daily basis. There are very few boxes, sold out there, that can fit an adult size cat comfortably. A cat needs to have a good amount of space to turn around and to choose an area that is not soiled. If your box is the size of a paper sack, how can that be enough for a grown cat? You want to make sure your cats adore their potty! A happy cat = a happy home! I chose to make my own litter box out of a 50 gallons storage tote as I could not find one that size. Yes, you read that right, fifty gallons. And no, I do not own a maine coon. When I got the box I only had Rufus -- a kitten (she was 3 months old and weighed a little under 3 lbs). Yes she looked ridiculous in that huge box, but she learnt to love all that space to roam around. And that's what matters. The bigger the box, the better...remember size does matter!
  4. LITTER STYLE MATTERS. All cats are not made alike! They all enjoy different styles of boxes. Some of them are happier with covered boxes (they may like the privacy) some of them prefers open boxes (the dust content and odors do not linger as much). So make sure you switch it up and try to figure out what your cat likes best. Some people are not fond of cleaning the litter box, so they will resort to using automated self cleaning boxes. In my experience they are not the best idea. For once, I like to clean my box and see what's going on. I like to see how many times a day they peed, how many times they pooped and off course I can realize really quickly if something is wrong (diarrhea, constipation...). That cannot always possible with a self cleaning box. Secondly, I have had a chance to see how these 'machines' operate (I had a few friends that had different kinds) and I was not impressed with the results. It seems like many of those boxes leave behind a lot of small crumbs. These small particles become very smelly as they are left to marinate in the box. I have smelled the worst smells from what was supposed to be a clean box. I just rather scoop out my box daily and not ever knowing it is there.
  5. LITTER BOXES AMOUNTS MATTERS. The cat's rule of thumb is: one litter box per cat plus one. So if you have one cat you need 2 boxes. If you have 2 cats you need 3 boxes...and so forth. It may seem ridiculous to some...especially if you have 4-5 cats in the house. But believe it or not having more than one litter box may be the best thing you can ever do for your cat. If you live in a multi level home, you should try to have a litter box for each level. A cat should never have to go too far to go potty. Also in a household with multiple cats, having more than one box can help if both animals need to use the box simultaneously. 
  6. LITTER BOX PLACEMENTS MATTERS. You should try to place your litter boxes in quiet areas. Away from loud noises and other animals. Sometimes cats can grow afraid of a noise and decide to stop using the box all together. You should also pay close attention to the other pets in the home as sometimes there could be some bullying issues. If a cat feels threatened or bullied in his litter box he will definitely stop using the box and find a new place to call bathroom. The litter box should NEVER be next to the food and water bowl. That is a big NO NO for a cat. Would you like to have your dining room table next to the toilet? No? Well, neither do cats! Remember...their sense of smell is far superior to yours! Be smart and put yourself in their shoes!
  7. LITTER CLEANLINESS IS A MUST. Cats are very clean animals. They are very particular about being clean (grooming about 50% of their lives....mmmm, cleaner than humans I may suggest LOL). They are also gifted with a sense of smell that is 14 times as strong as yours! So imagine what that box must smell like to them!!! Don't be lazy and clean the litter box once a day! Period! If you would not appreciate going potty after you have left a 'brownie' in the bowl to marinate all day, then neither will your cat! So get that scooper out and scoop the box once a day.
  8. TERRITORIAL ISSUES. Cats are not like dogs people! Keep that in mind if you are thinking to introduce a new cat into your household. Chances are, your in-residence cat will not appreciate that move. It takes MONTHS of hard work to introduce a new cat. Disregard this clue and reap the unpleasant benefits! Most of the times if you really take your time and do all it is needed to properly introduce a new cat, you should not have improper elimination enter the equation. However, with a few stubborn cats this may still present an issue and you may have to permanently separate the two cats for the behavior to stop.
  9. DRY FOOD VS. WET FOOD. As most cat owners, I had 2 cats eating kibble...that was until Smokey started to have litter box trouble! I was oblivious that kibble was to blame...I only knew that Smokey was going #2 in front of the litter box rather than inside. His poo was hard as a rock, so I thought he was just constipated and needed fiber. For a while I added canned pumpkin to his diet. He had no problem eating it, and it was a good source of fiber. But the problems continued. To top it all, I finally realized that he had a massive blockage and I had to rush him to the emergency room for UTI surgery. About $2000 later I found out that the culprit was most likely the dry food. Cats do not have a sense of thirst (in nature they get their fluids from their pray), so eating kibble they are constantly dehydrated. In addition, dry food is just packed with minerals and nutrients and, without water, these cannot properly be flushed out of their kidneys and therefore cause UTI's, painful bowel movements and so forth. If a cat feels pain while eliminating, he will learn to associate the pain with the box. He then will try to find another suitable spot, in the home, where to try to evacuate hopefully pain free. Cats naturally have the need to bury their waste, so they often chose blankets, bedding and such areas as their plan B. Switching your cat over to a completely wet food diet may be the best thing you'll ever do both for your cat and for your wallet. Since his surgery, Smokey has been on a wet ONLY diet (I use kibble as a snack in between meals or if I am gone overnight -- for its convenience). I feed him a can of wet food a day (mixed with a can of water...sort of like a soup). I split it in half and he gets 1/2 of it in the morning and 1/2 of it around dinner time. This ensures that even if he never makes it to the water fountain, he still get a full can of water a day. He has been doing great on this regimen and I have started to do the same with Rufus's wet food. Sometimes it may be hard to get them to eat this soupy concoction, if they turn up their nose try to add the water a spoonful a day. Start with a little until your cat gets used to the texture and flavor and work your way up to a 50/50 water/food ratio.
  10. GOOD QUALITY FOOD. One cannot feed cheap/poor quality food and hope for the best. I often think that a lot of cat's health issues (and subsequent litter box etiquette faux pas) can be attributed to crappy food. You don't eat only junk food, so neither should your cat! When choosing a canned (or dry food for snacking) read carefully the ingredients list. If all I see is BYPRODUCT or MEAL, I run for the hills. I want the first ingredient listed to be a protein source: chicken, beef, fish, duck, etc. Not chicken byproduct or chicken meal! Cats need to eat muscle meat, bones, organs etc to be healthy...not just scraps! That's what a byproduct or a meal is. A mixture of meat scraps that are leftover from meat processing plants! Another thing I don't feed my cats are GRAINS. Cats don't need much carbohydrates and all the corn and grains that you see in cat food are only there to act as a filler. They make the food cheaper and the flour binds it together. They are not there to provide any nutritional value! Cats are not herbivores. They do not need corn in their diets! So stop feeding them cheap food and you will save money and trouble in the end!
One of my favorite sites to learn about cats and their 'upkeep' is catinfo.org
I found it to be an endless source of sound/unbiased information ranging from nutrition to bathroom etiquette. So, if you want to know more about your cat, just head over to this site and read away! This may just be the best feline website you will have stumbled upon!