Since I will be gifting them, I made a large batch that yielded 16 cups of gummies, but the recipe could be shrunk down if making just a few.
 |
| Strong peppermint drops |
INGREDIENTS:
For sugar syrup:
8 cups sugar
2 cups water
For gelatin:
3 packages (12 envelopes) plain gelatin
2 cups cold water
For finishing:
1/4 tsp each FOOD GRADE oils or essences (I used lemon, orange, vanilla and peppermint)
10 drops food coloring
(amounts based on quartering recipe to make 4 flavors/colors gumdrops)
2-3 cups Sugar (for coating)
I made the gumdrops in 2 separate batches, as I did not have enough molds to make the whole batch at once. The process was the same for both batches. I started by making a simple syrup with 4 cups of sugar to 1 cup of water.
I brought to a boil on high and simmered on medium...
...as the sugar water boiled down it became more translucent.
This is how it looked after 5-6 minutes of rendering. (on my second batch I cooked it longer, more like 10 minutes to get a thicker syrup. I feel like that was more successful in hardening the candy a bit more).
While the syrup was cooking, I put 1 cup of cold water in a bow and evenly sprinkled it with 6 envelops of gelatin
The powdered gelatin set quickly in the water...
...I stirred it to make sure that all the powder got evenly wet and mixed.
I then added the HOT simple syrup to the gelatin. I mixed well for several minutes trying to get rid of all the unsolved clumps of gelatin. I removed, with a small sieve, the few remaining unmelted clumps of gelatin...
...until all that remained was a clear liquid (with my 2nd batch I got a thicker liquid, which yielded a better and firmer candy).
I divided the liquid equally in two containers and added 1/4 tsp flavoring, 10 drops coloring each and mixed very well to incorporate.
I then poured the liquid into my 2 silicon molds and let set in the fridge overnight.
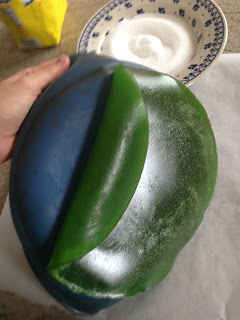
The next day I carefully peeled the gelatin from the mold
I placed it on the counter on a parchment paper sheet.
I then proceeded to cut it first into strips and then into small cubes (I often dipped the knife in warm water to help with the EXTREMELY STICKINESS).
I rolled the little cubes in white sugar to coat and to prevent them from sticking to each other
I carefully placed them on trays lined with more parchment paper.
I then had to dry them to make them firmer and easier to handle/store. I covered them with a clean dish towel and put them inside the cold oven (to keep them safe from the furbabies). The first batch took FOREVER to dry. I am talking like more than a week, because I did not cook the simple syrup long enough -___-
The second batch, made with a thicker syrup, turned out much better. I only dried them for 2 days and they are prettier too.
You can clearly see the difference here. The blue candy is so much crisper and prettier than the yellow candy. I am not going to lie, it drives my OCD nuts to see that the sugar is 'messy' around the yellow and orange candy, but it will have to go down as my messy 1st attempt o__O
I mixed the lemon, orange and vanilla flavored gummies in a large bowl, but I saved the mint gumdrops to package them alone. I did not realize that mint would be SO strong to even contaminate the other candies nearby, but that's what would have happened if I had packaged them together. The vanilla candy got a slight minty scent just by sitting in the same cold oven to dry for 2 days. Nuts!
I got some treat bags and some labels at Hobby Lobby (it is very important to use food grade containers and off course also flavoring, if using oils they MUST be food grade).
I placed about 1 cup of gummy gum drops per bag, I adhered the labels (before filling the bags) and I tied a cute ribbon around it.
And that's it. Candies are ready to be gifted!
Happy 2016 peeps.


No comments:
Post a Comment